


Corset busks are a standard closure for the center front of a modern corset. They come in several varieties of shape, metal finishes, and qualities. Busks are also available in many lengths to provide a suitable closure for everything from a short waist cincher to a long-line corset.
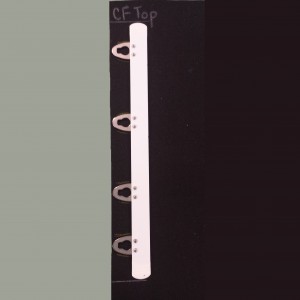
In this article we will be looking at an 11 inch “Standard Busk.”
When you measure the front of your corset for a busk remember to leave room at the top and bottom for finishing. I leave 5/8″ at top and bottom so I can sew 1/2″ bias tape and not break needles while sewing it on. I draft my Center Front to be 12.25″ to accommodate an 11″ busk.
Set the “Eye Side” First
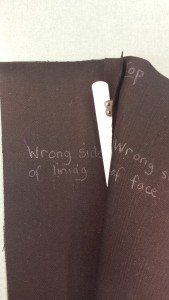
From the wrong side of your face fabric you will mark for the eye openings.
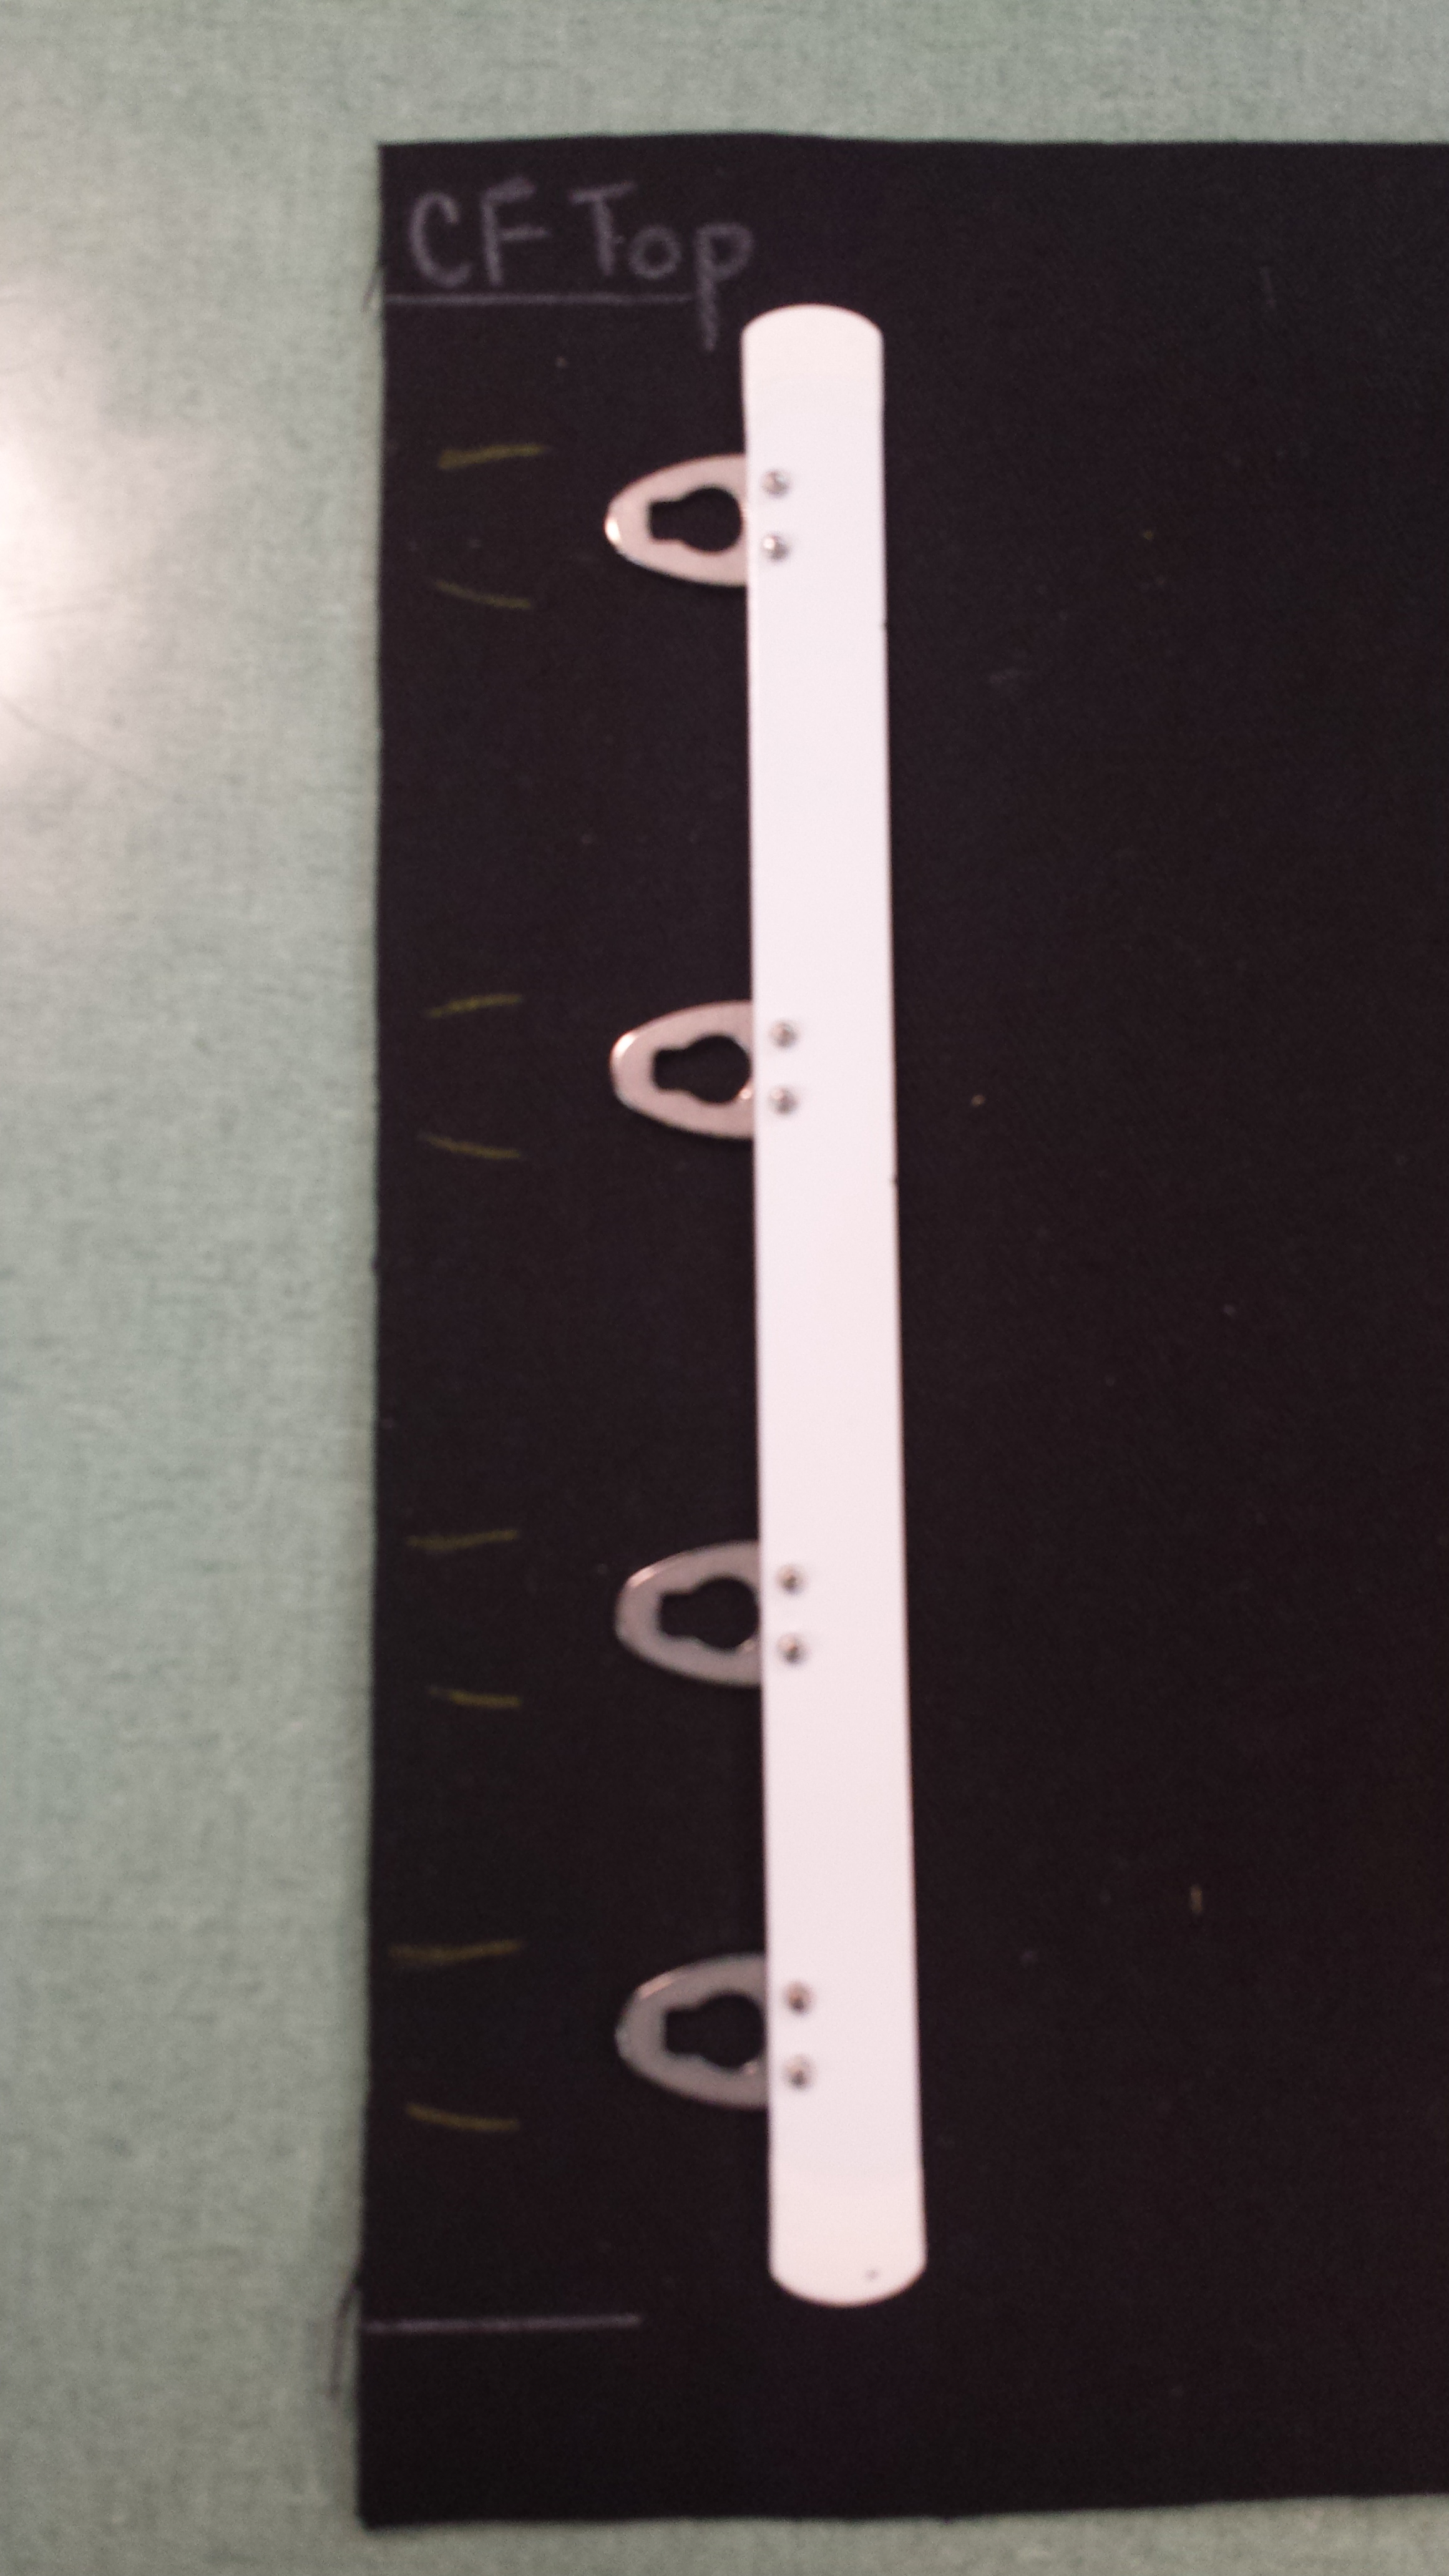
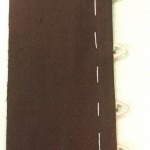
Place the eye side of the busk directly onto the fabric with the bar up, this will make sure the busk is facing the correct way in the garment. If you are using 1/2″ seam allowance you can lay the busk onto your fabric with the round edge of the eye at the cut edge of the fabric, it will place the bar of the busk 1/2″ from the edge.
Use a chalk pencil to mark the outside of the eyes.

Pin your face fabric to the lining right sides together. Sew your entire front edge, top to bottom, leaving openings where you marked the eyes.
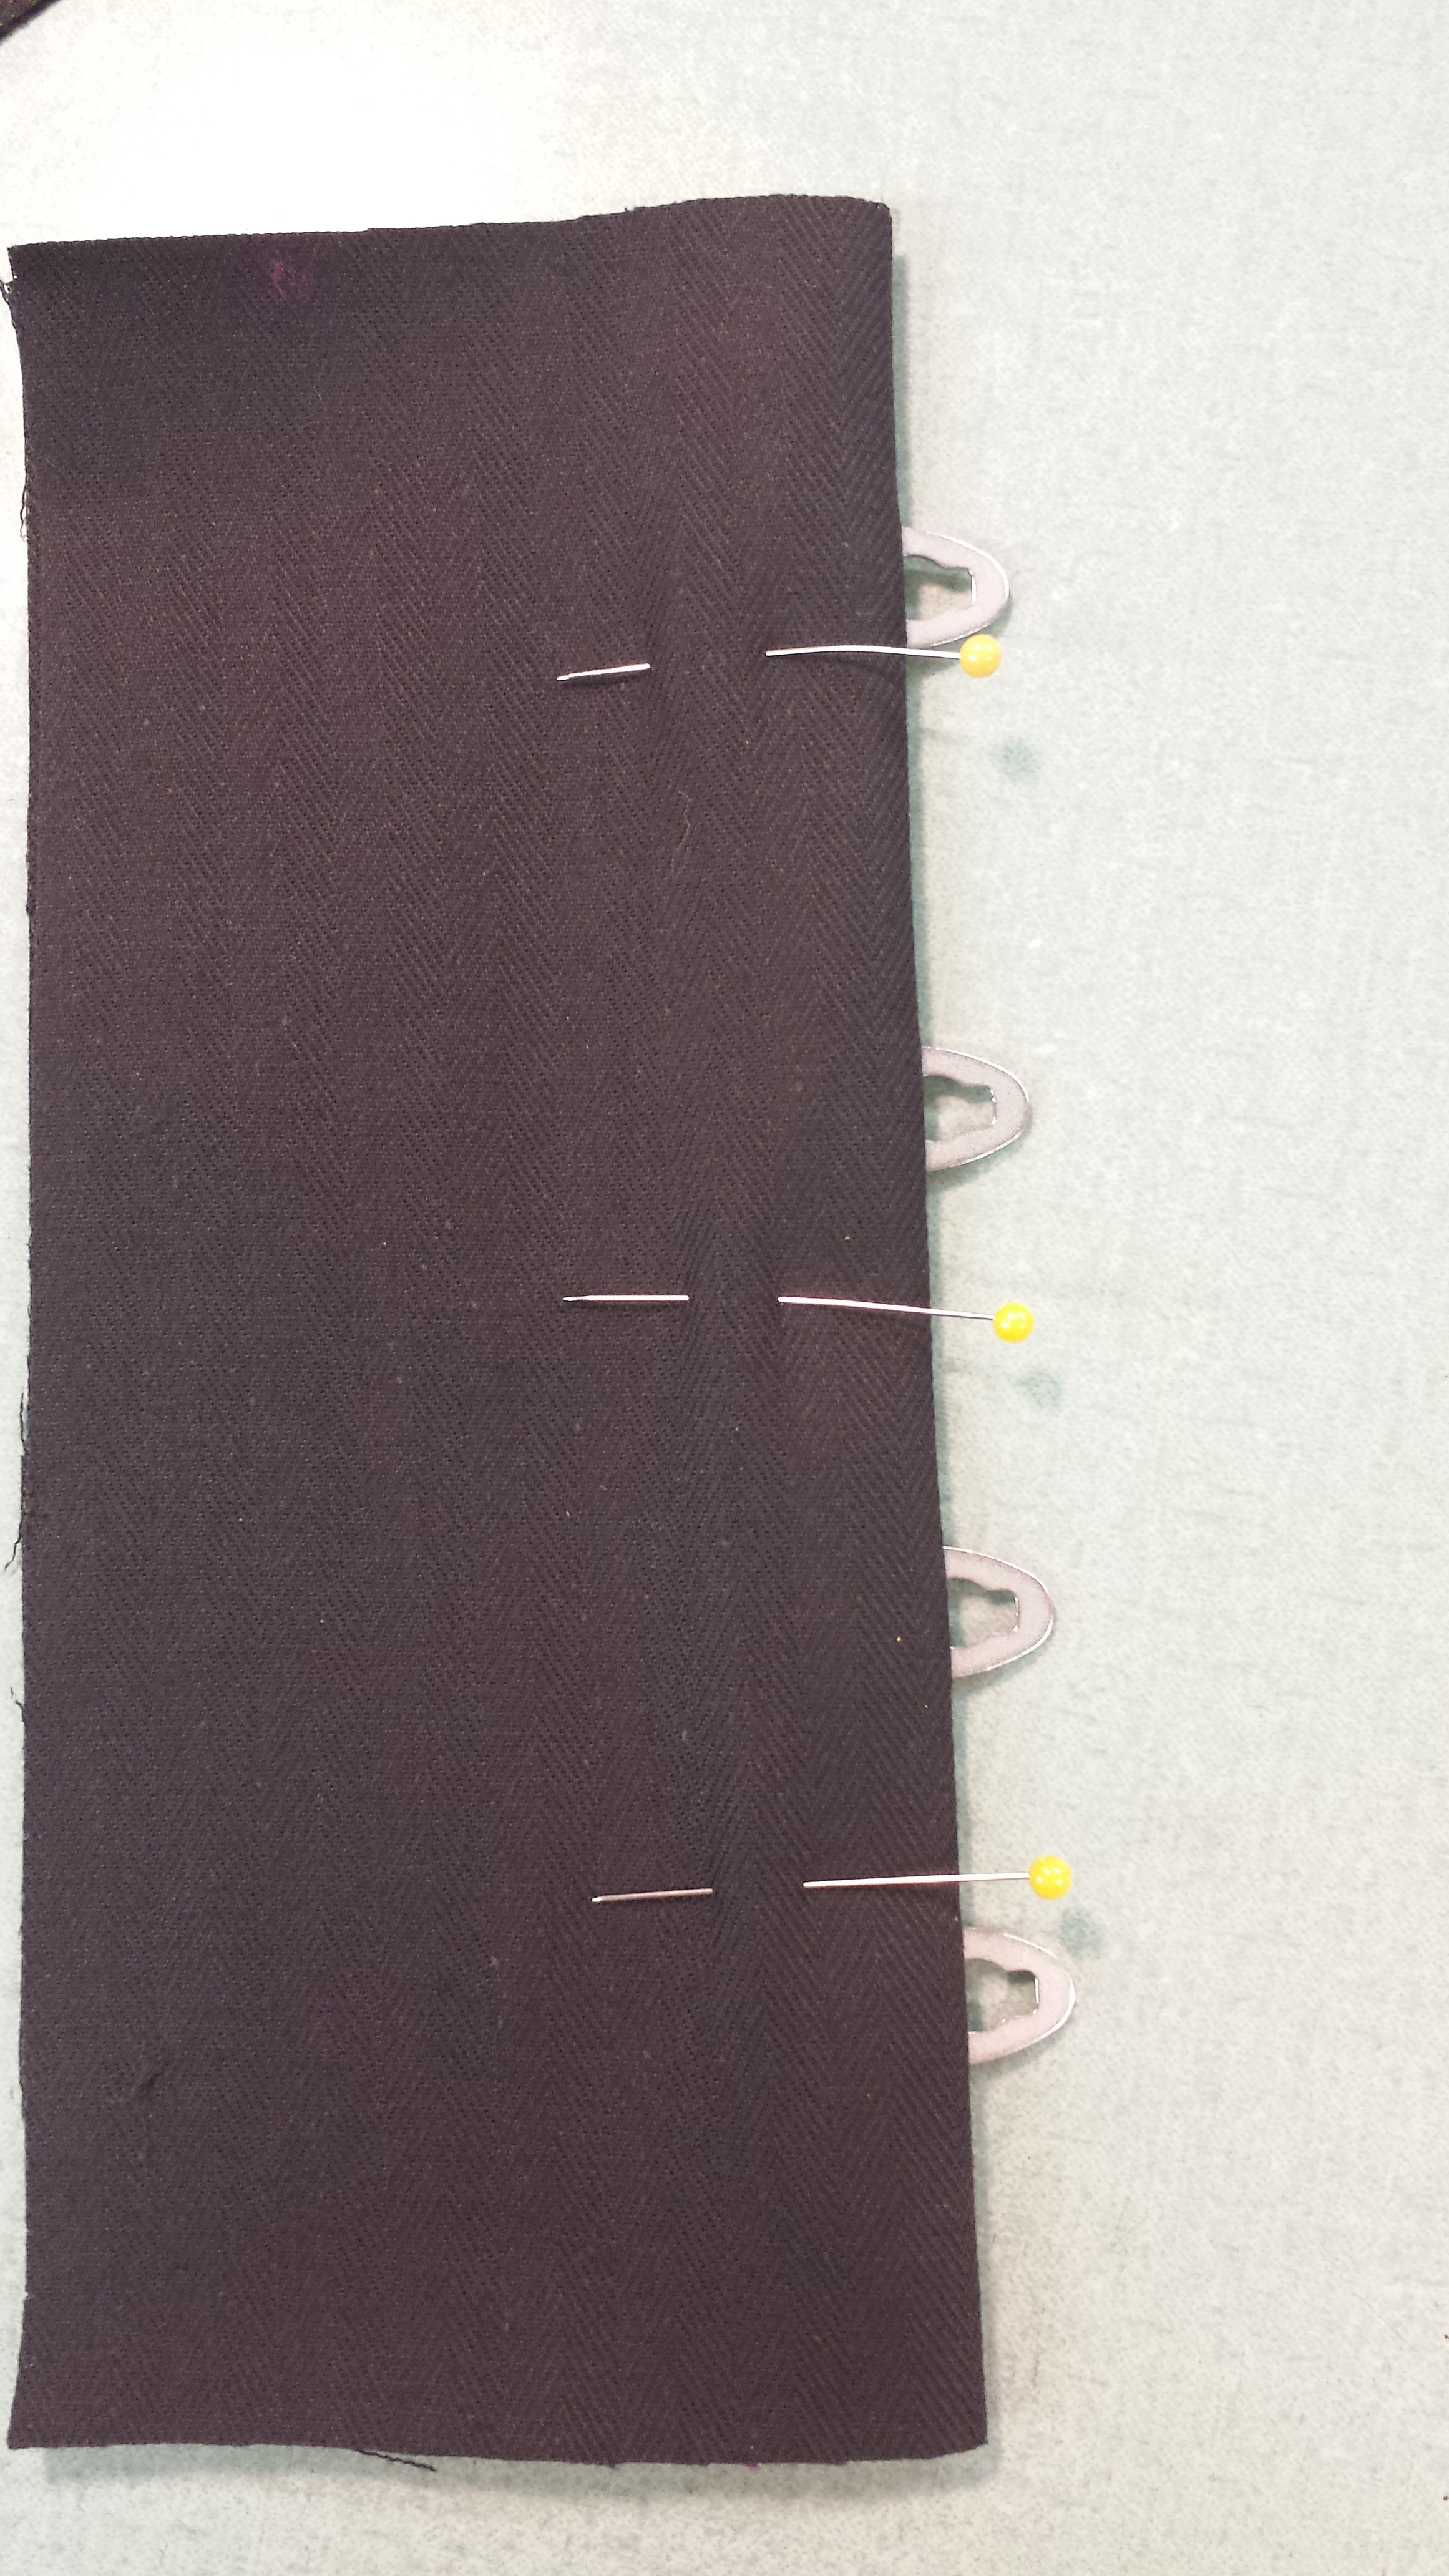
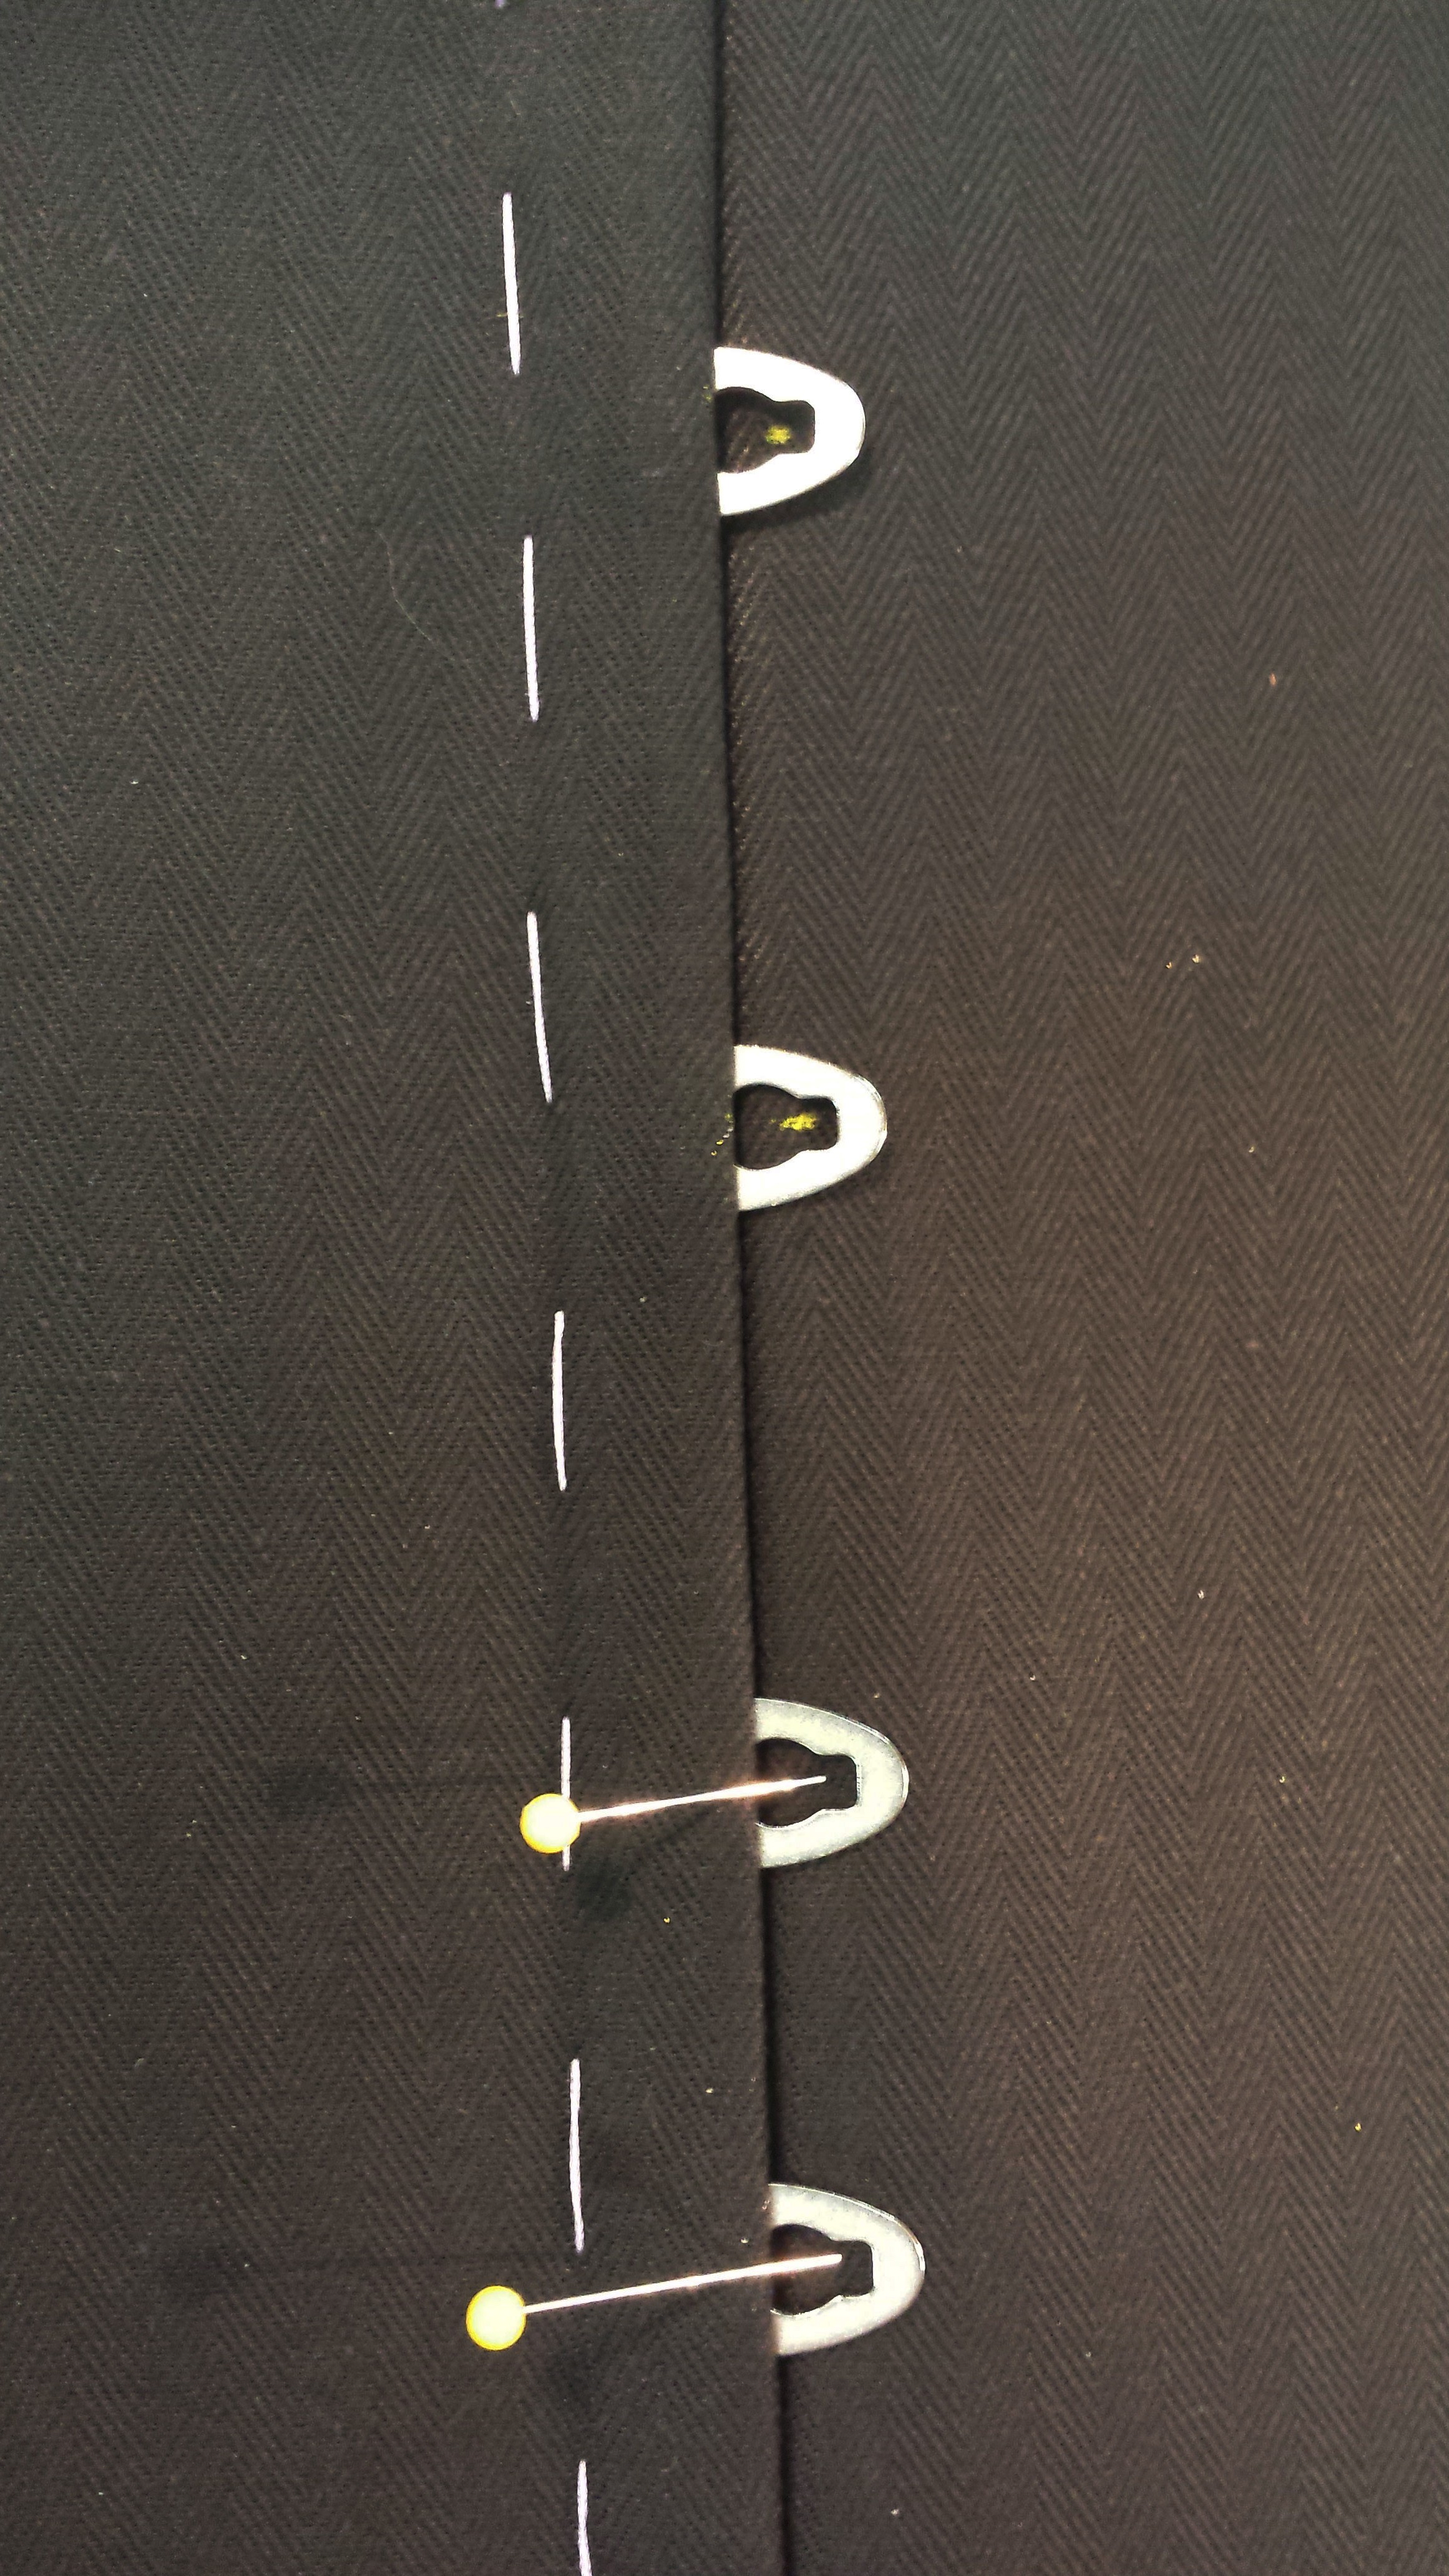
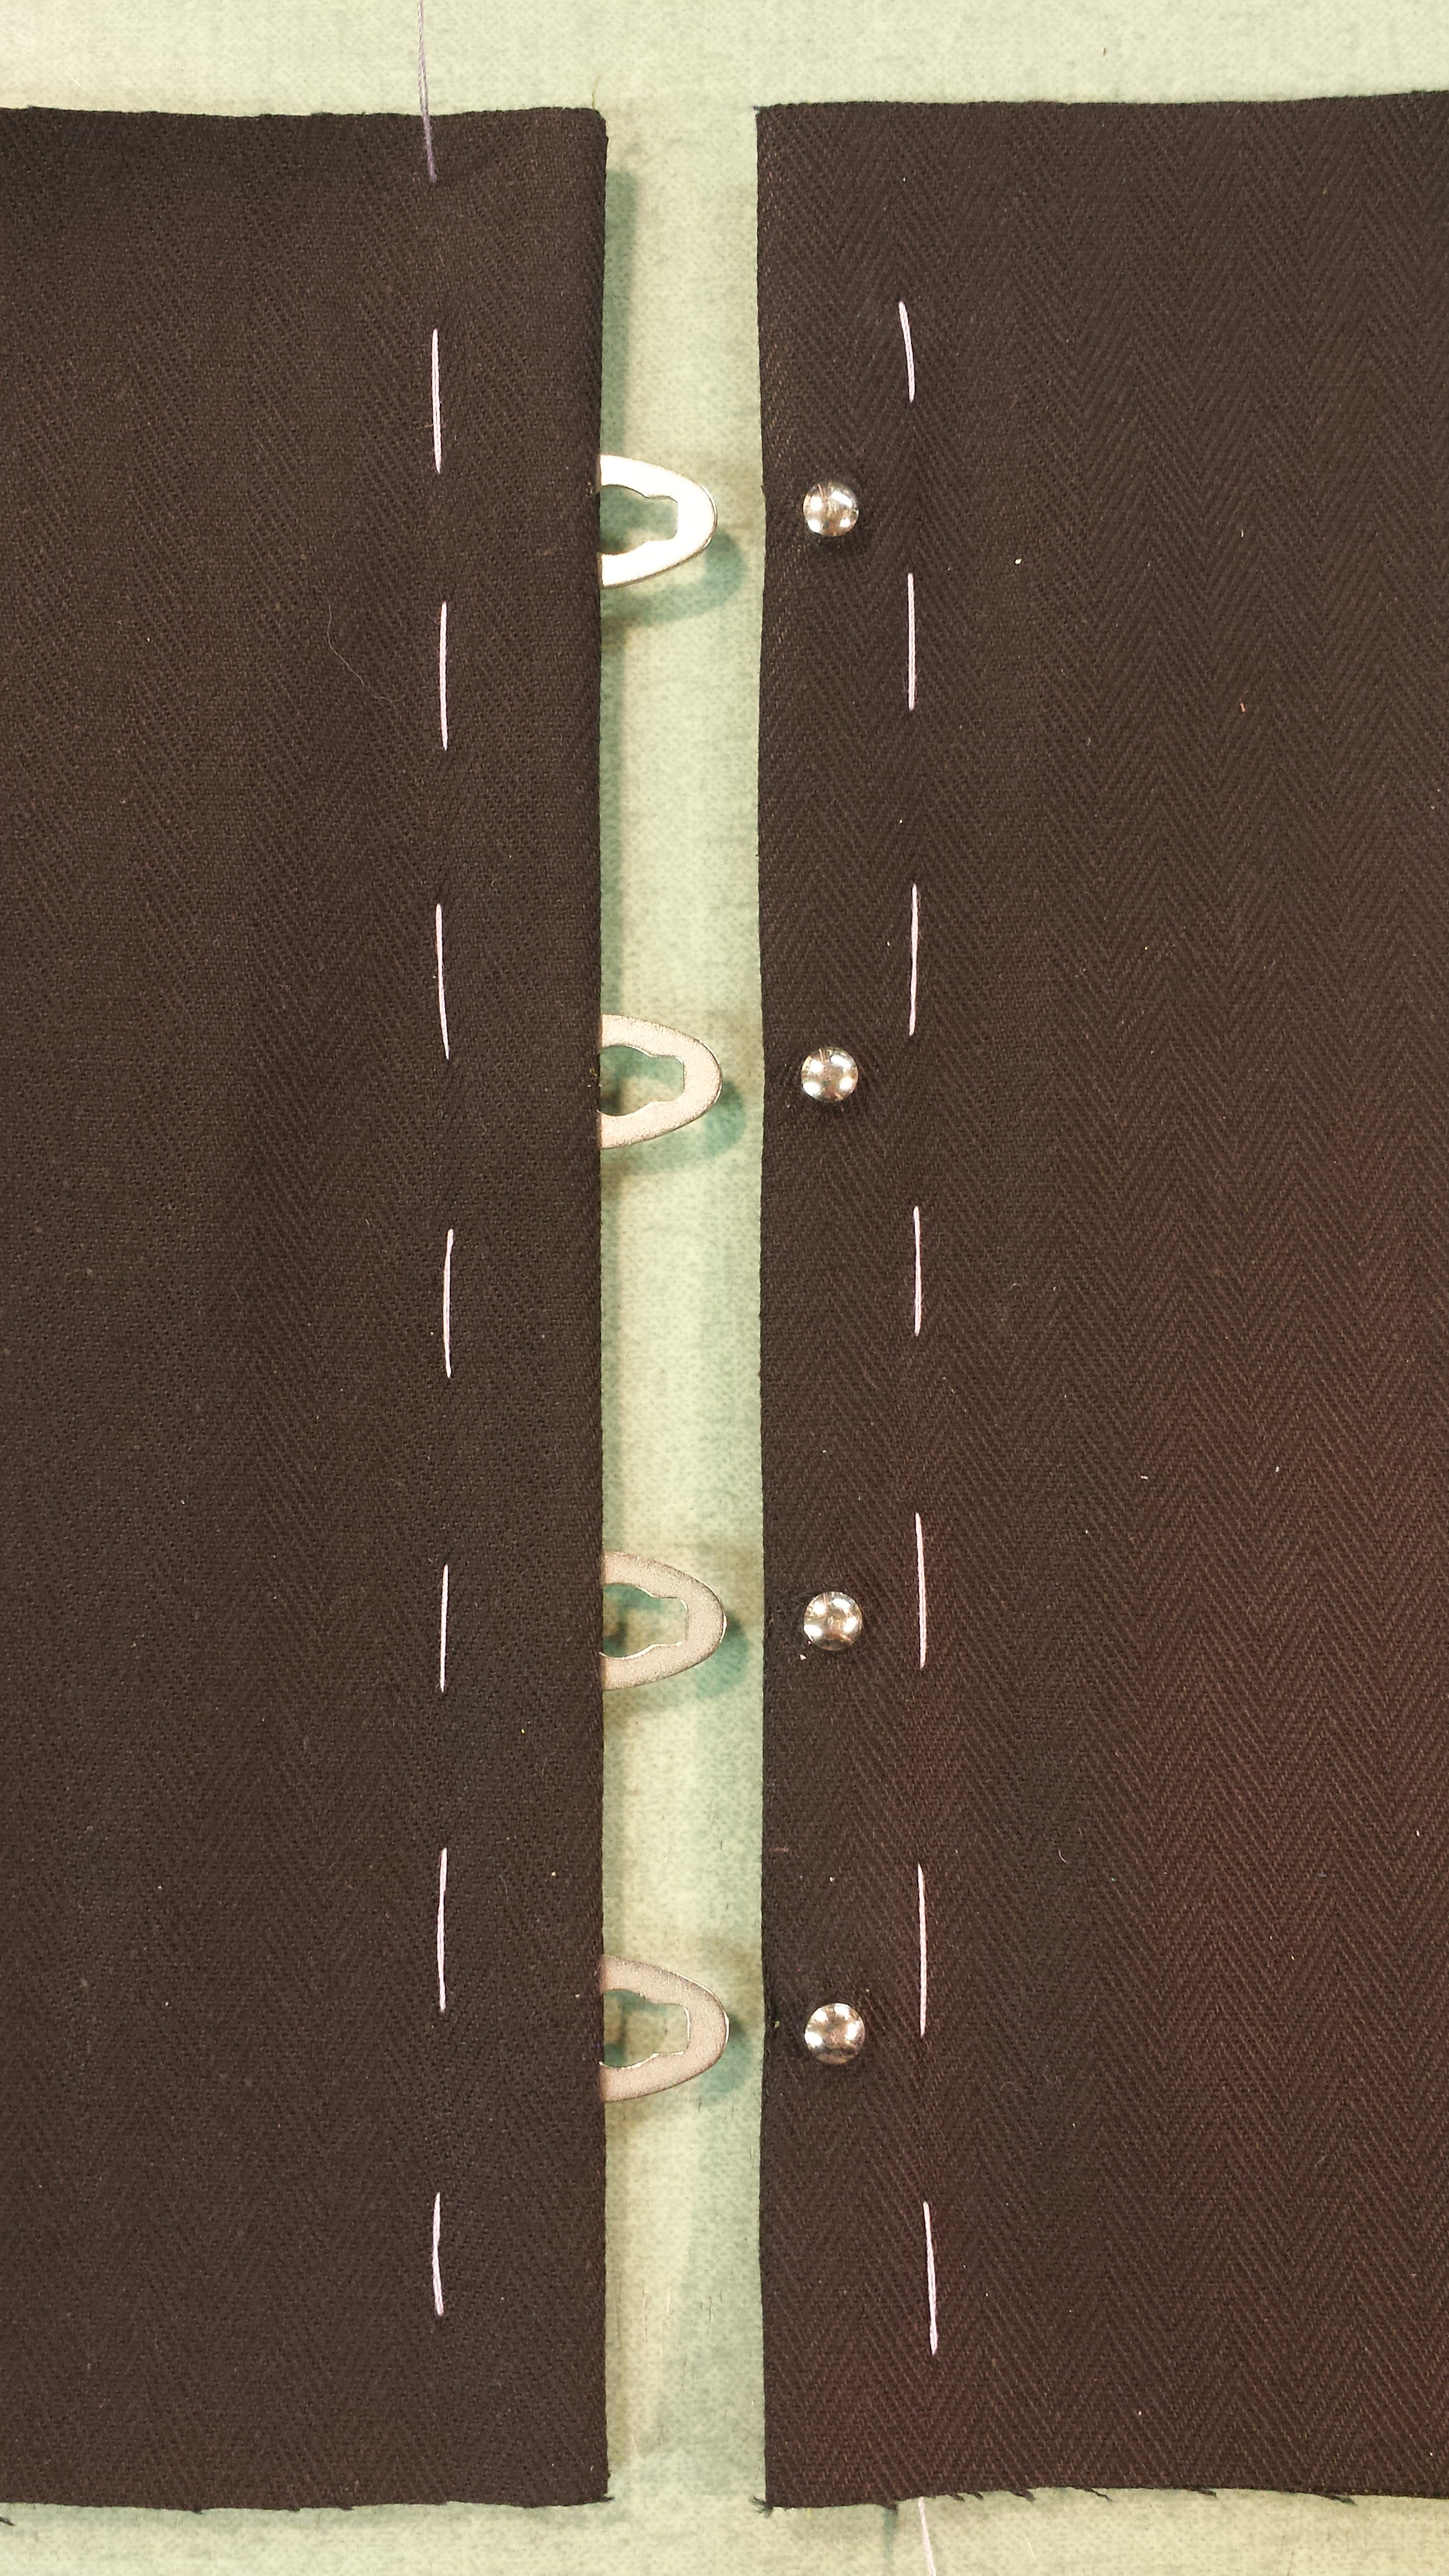
Press the seam open, then insert the busk’s eyes through the openings. Make sure the silver eye is closest to the face, and the white bar side of the busk is closest to the lining. Make sure your seam allowance is clearly out of the way of the openings.
Pin and then baste in place.
Set the “Post Side” Next
Pin your face fabric to the lining right sides together. Sew down entire front edge. Turn right sides out and press flat.
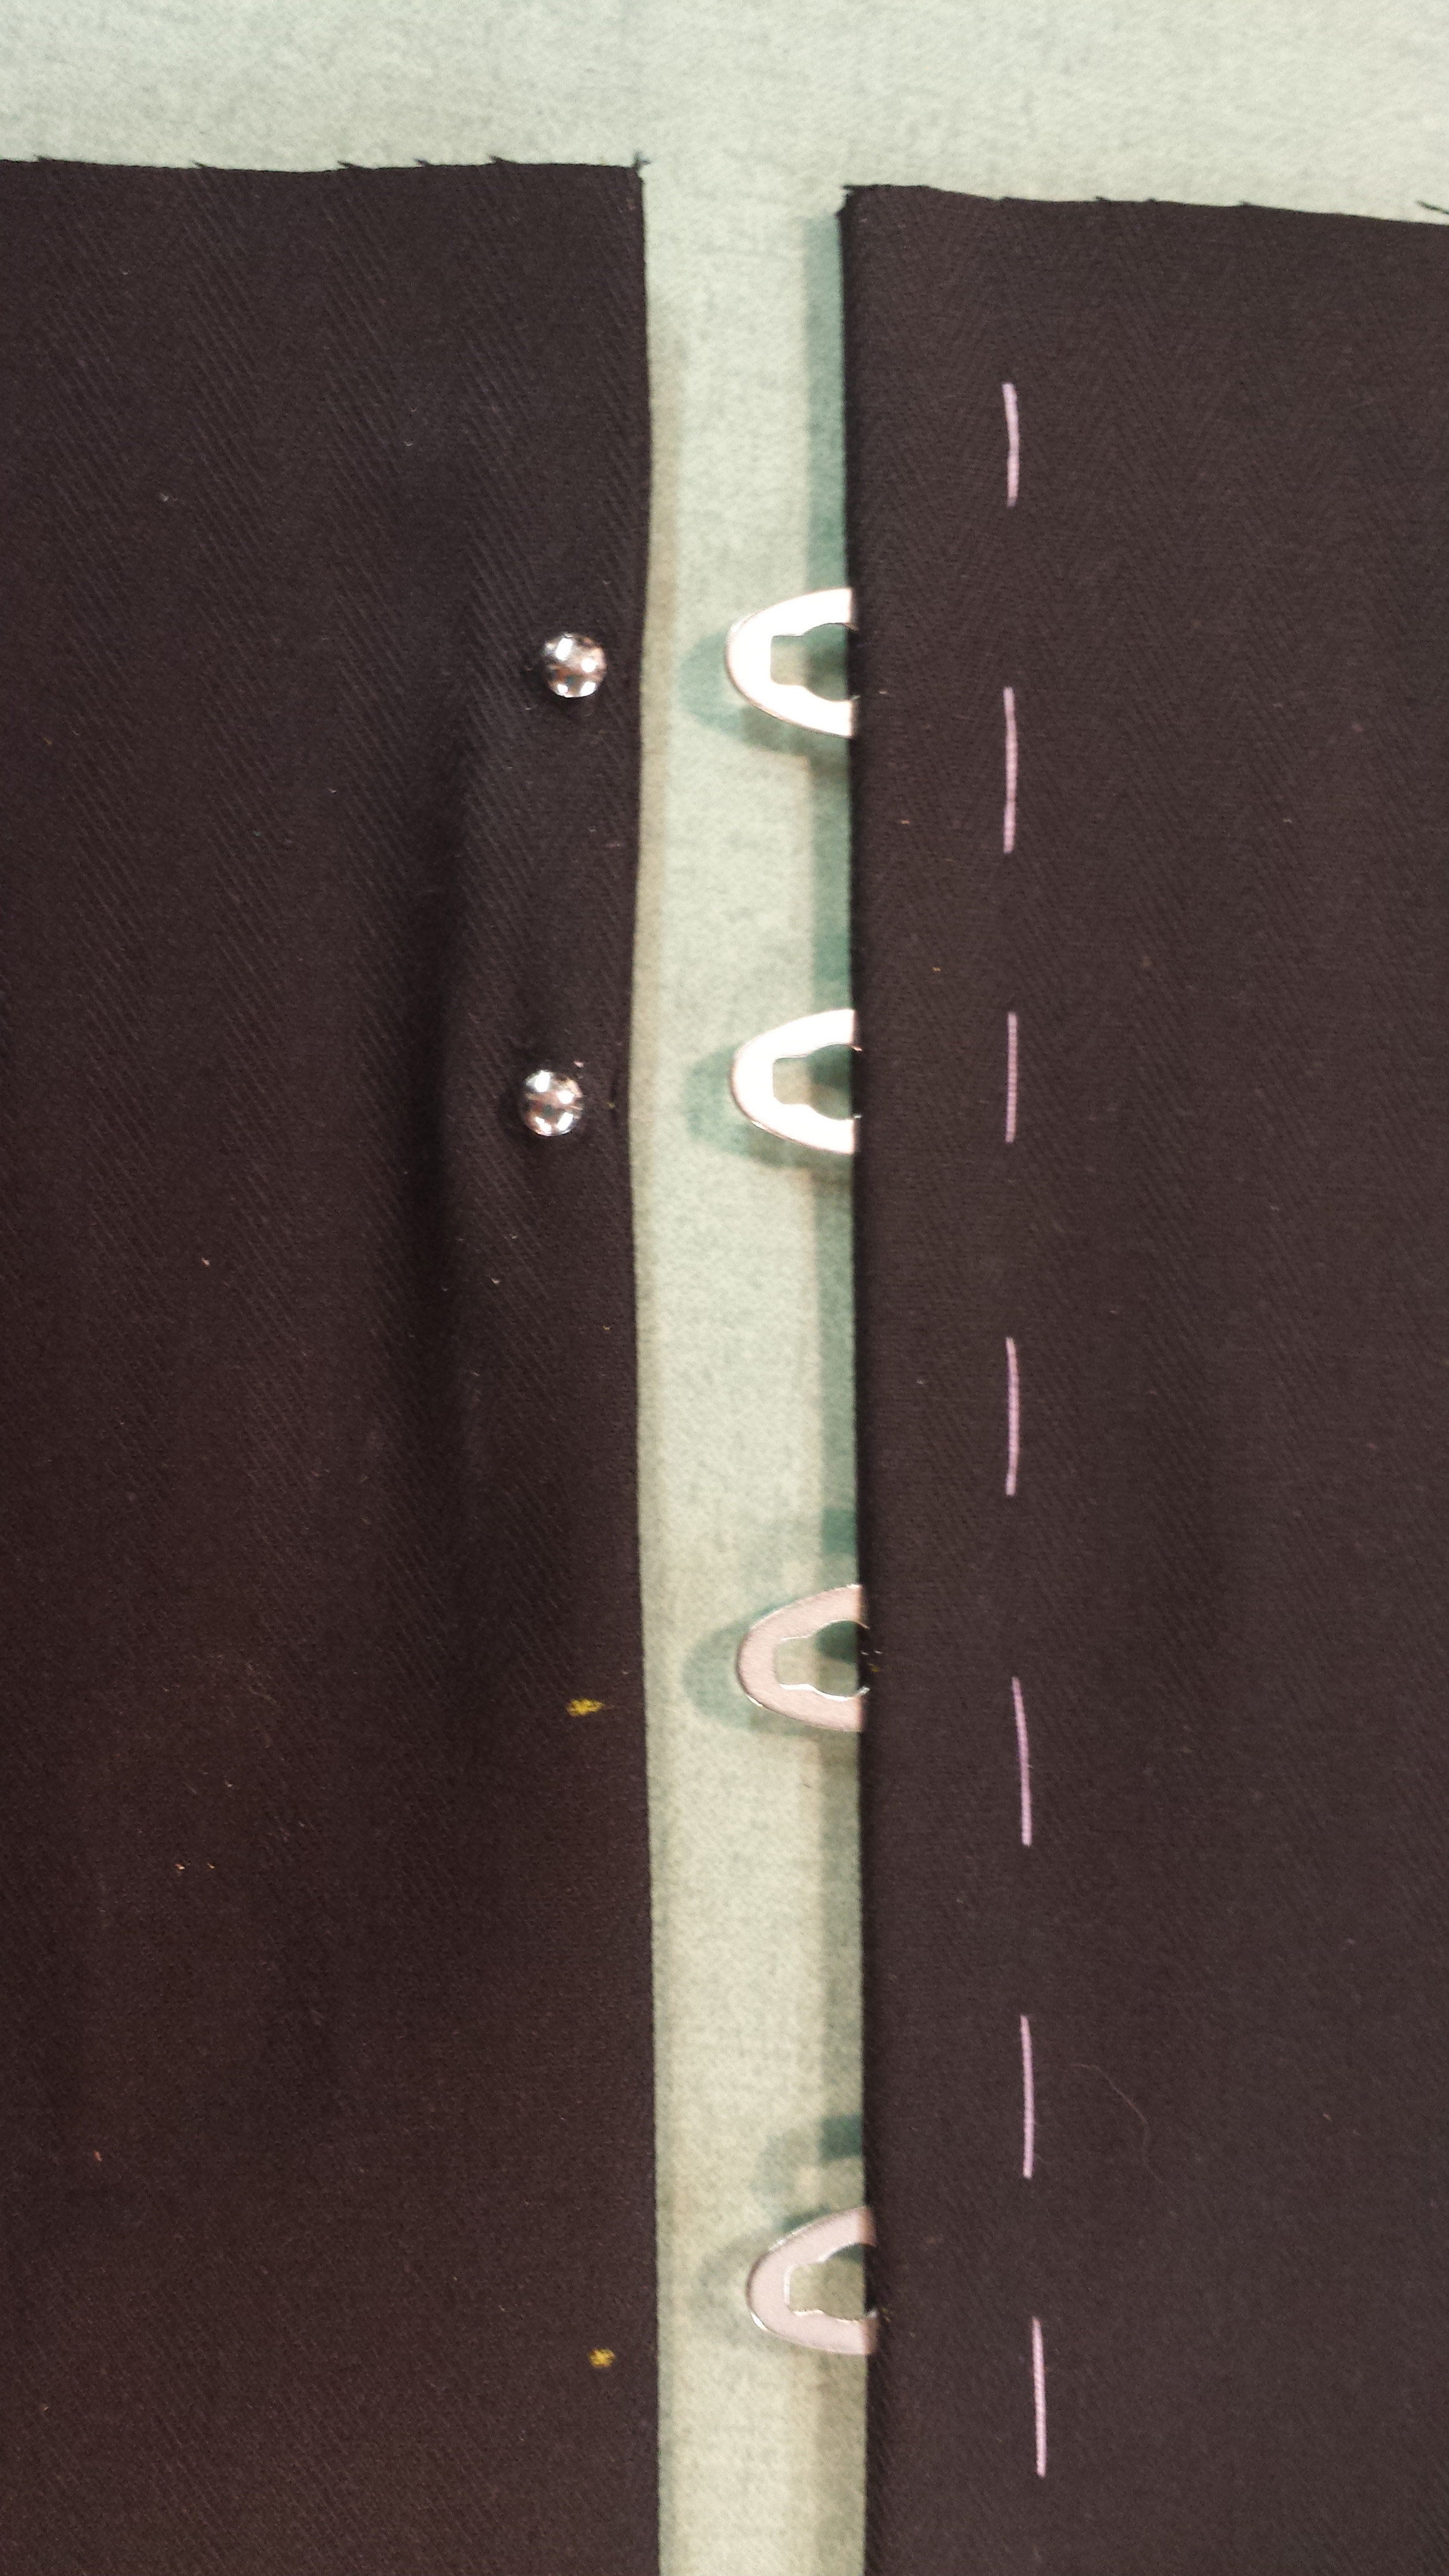
Place both sides together with the eyes on top of the fabric. Mark the center of the eye with a pin or chalk pencil.
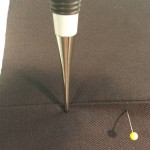
Using an awl, make a hole in the face fabric as large as needed to push the eye through. Go slowly so that you don’t tear the fibers. You can always put the awl back through the hole to make it larger if necessary. The awl will push the fibers out and when removed the fibers will gradually pull back together around the post.
When all of the posts are through the face fabric: pin, then baste in place.
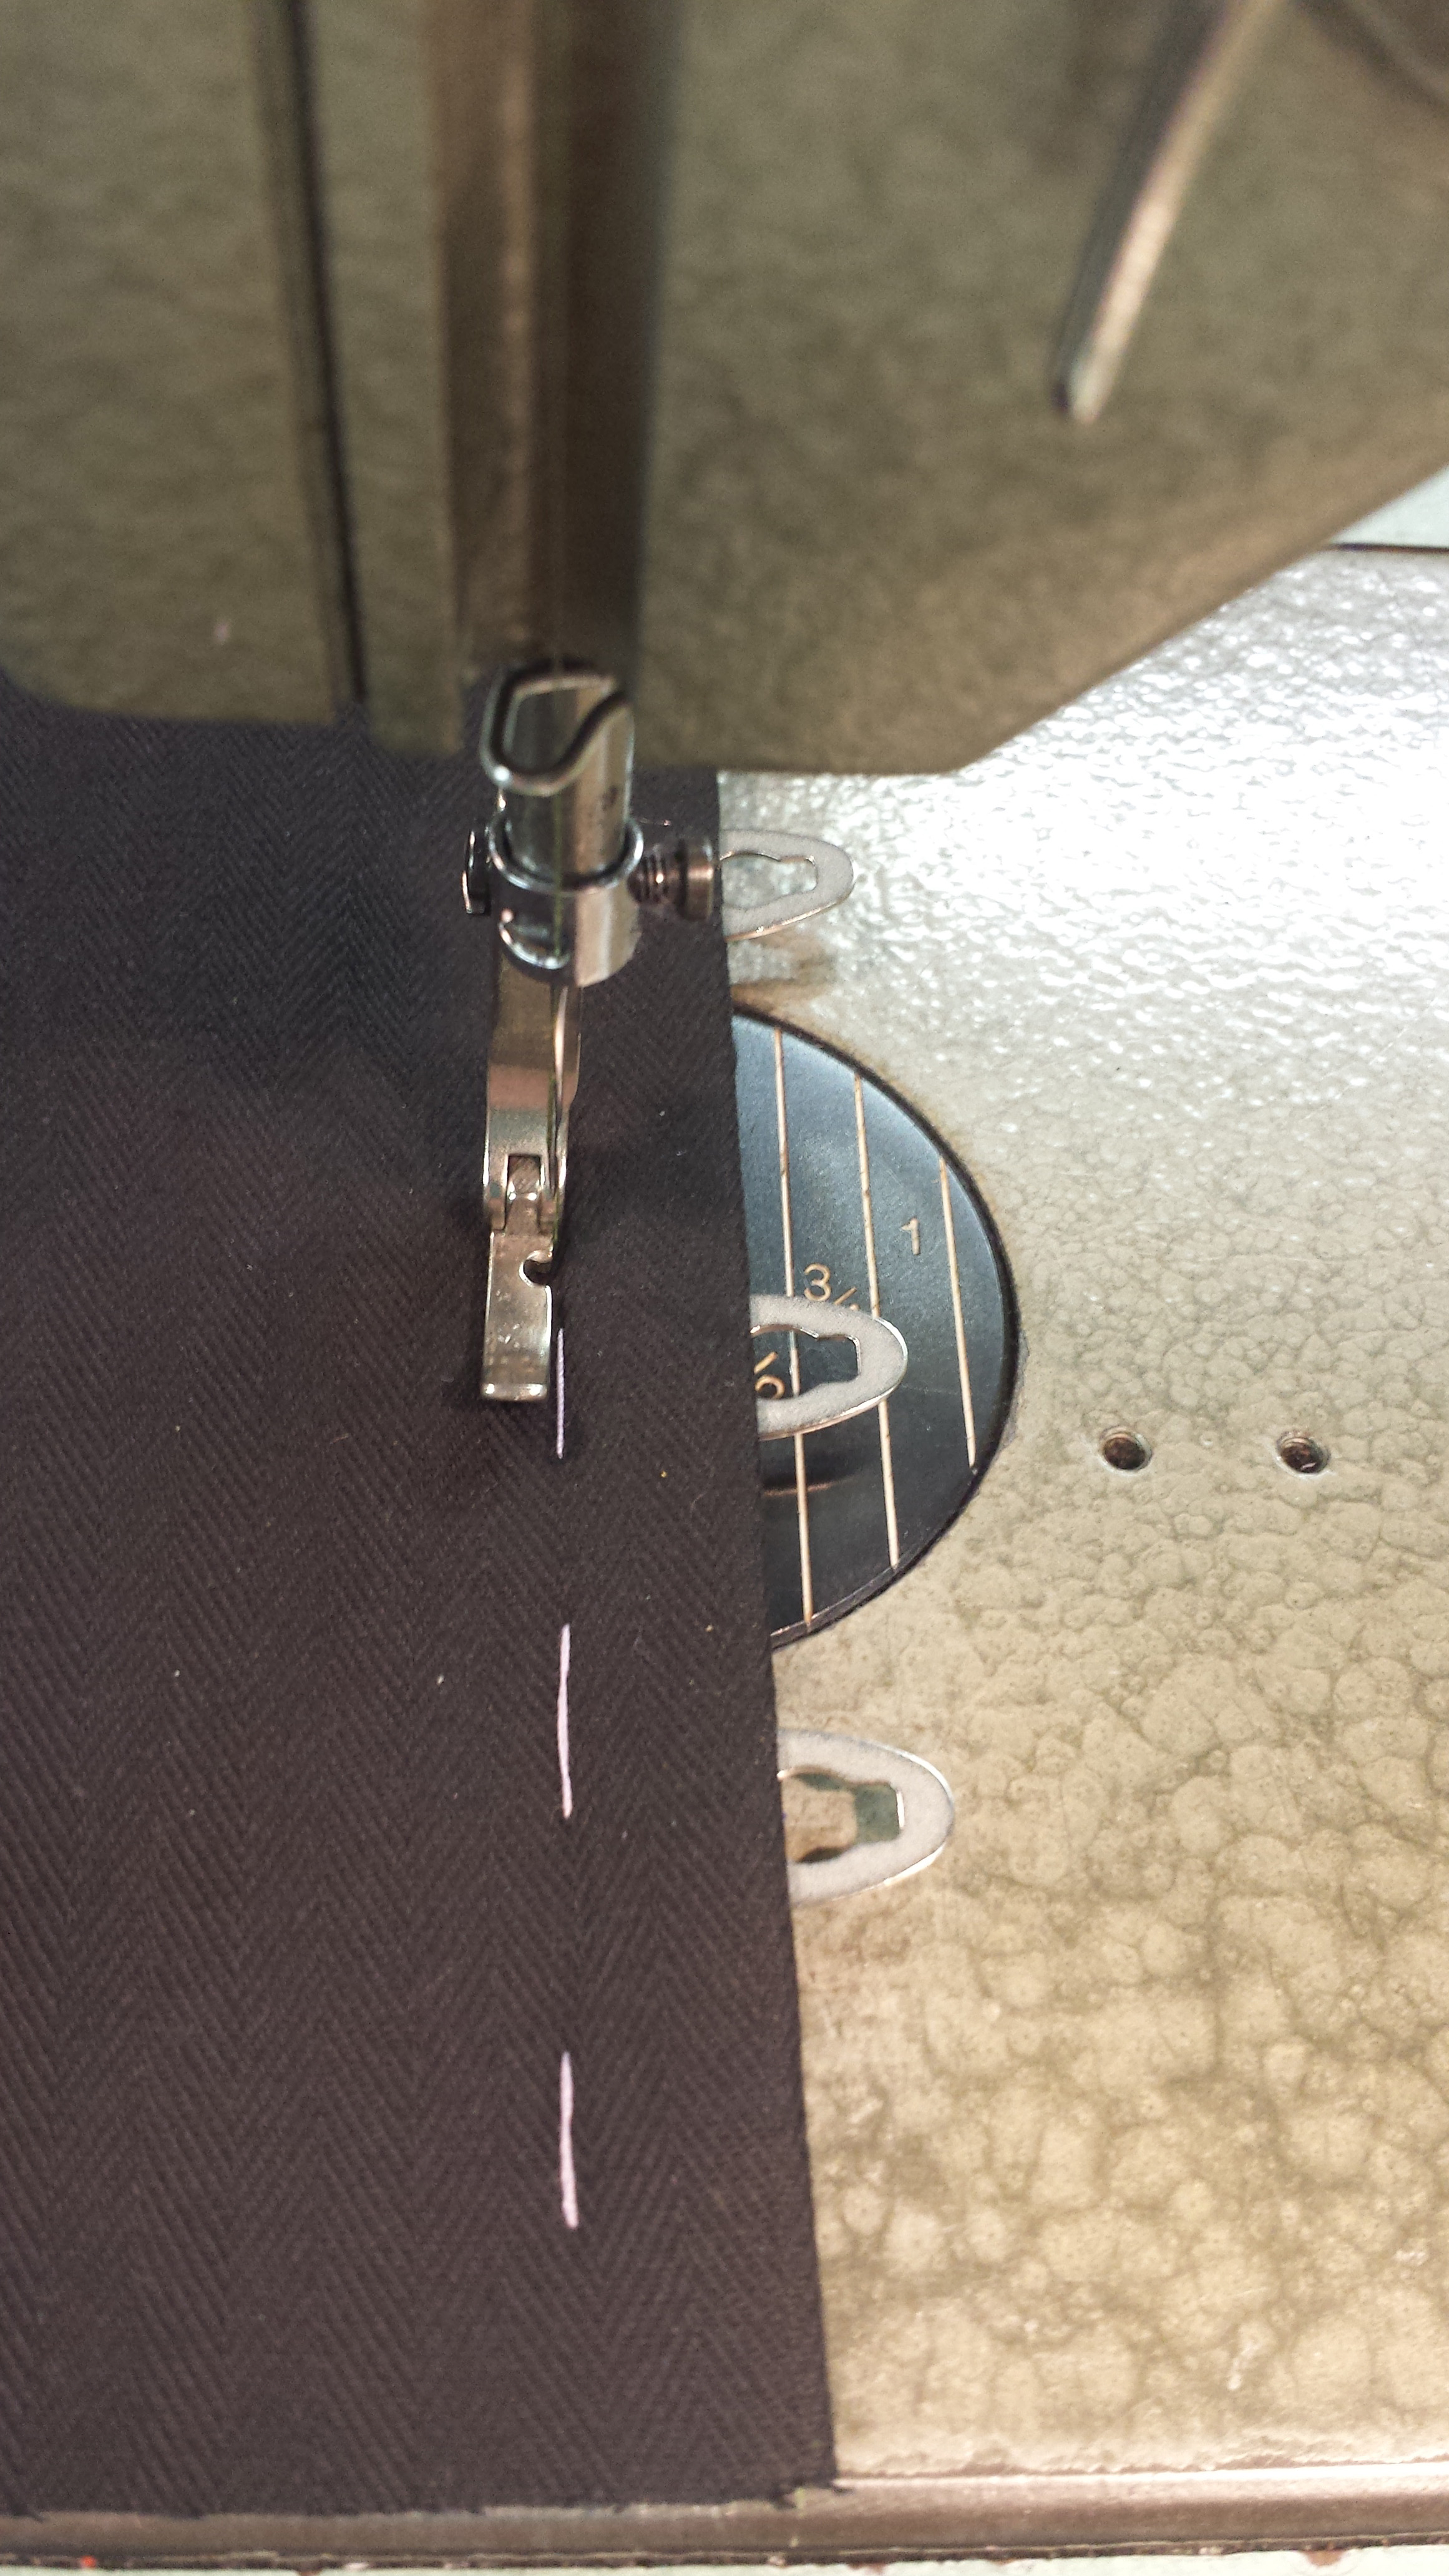
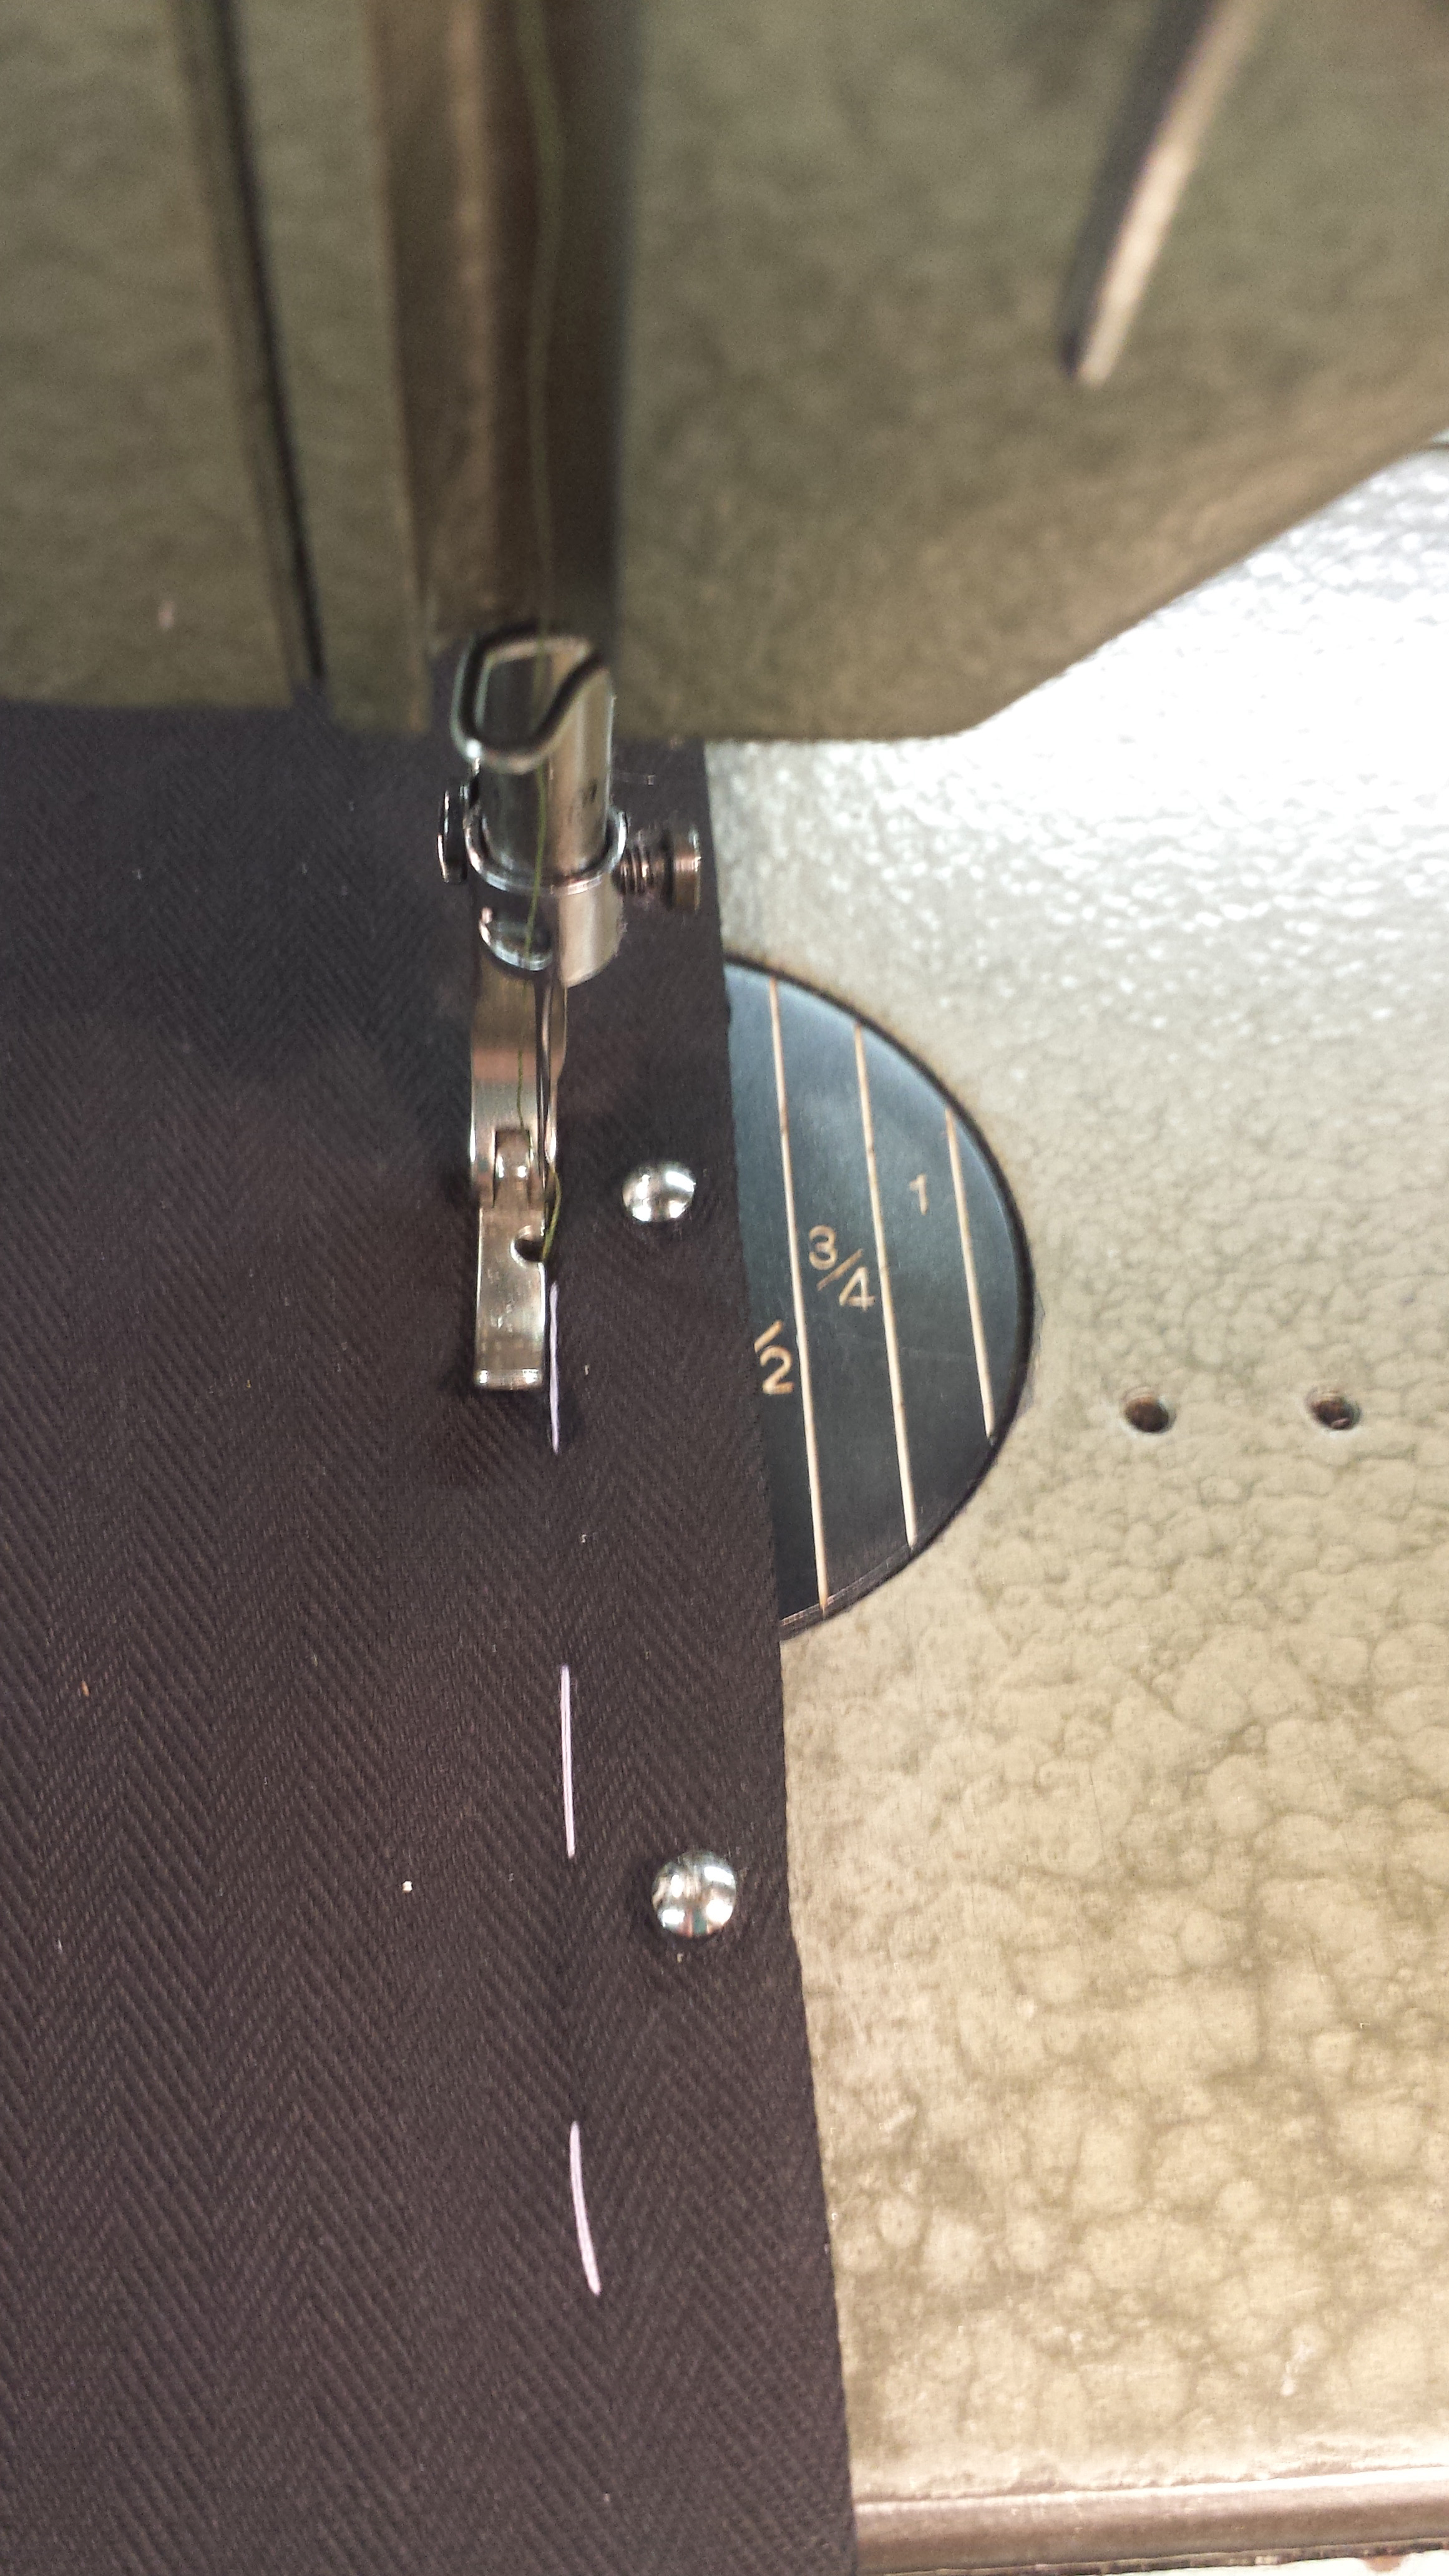
Sew along the edge of the busk using a zipper foot. Remove your basting stitches.

Enjoy making your corset!
~Amy Delicious


I read this, curious to see if you did it any differently than I do. I was pleased to see my brain had worked out the process in the same fashion. I guess that kind of thinking comes from my years and years of sewing. I wouldn’t have been able to write the process up so nicely though.
Thanks! Over the 19+ years of making Delicious Corsets I have accepted nearly 80 interns from area colleges and universities, even a few high school students. I don’t have the time to take on any new interns, but I figured I could still get the information out there.
Some of these posts are really aimed at beginners, but even after years of corset making I still have “ah-hah” moments and think “why didn’t I think of that years ago!” So, some posts may even help out seasoned professionals, and maybe people will teach me a few tricks in commenting!
~Amy Delicious
Do you ever put the post side between the seam allowances? Poking holes in two layers is annoying, but the thickness imbalance has always bothered me.
It just occurred to me that it would be fine to clip a little hole in the seam allowance layer, you wouldn’t have to use an awl.
Alaina,
We put the busk in so that the seam allowance wraps around the underside of the busk. That way the edge of the busk isn’t directly against the seam, so it can’t push through the seam.
The benefit of using an awl is that it separates the fibers wide enough to allow the post through without breaking any of the fibers. After the widest part of the post goes through the hole the fibers tighten back up around the post. Using the awl will produce a cleaner and more professional finish.
If you cut even a small hole, with prolonged wear the hole will get frayed and larger.
For an inexpensive tool, it is an important one that can also be used for rivets, 4 part snaps, eyelets, and other embellishments.
~Amy