


This is a tutorial of the Yaya Han Overbust Corset pattern with cups by Jack Spicer at:
https://www.facebook.com/Spicercosplay/
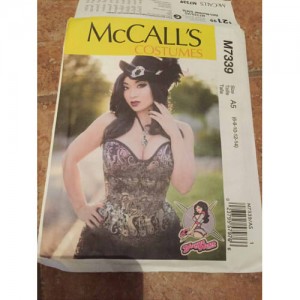
For a beginning seamstress, corsets can seem very intimidating, but they are more meticulous than difficult. Yaya Han’s Overbust/ Underbust Corset Pattern for example, is pretty accessible to beginners who are willing to put the time in, especially into looking at the instructions first. Probably the most important part to this is looking over the instructions before even cutting out pattern pieces.
Starting out, I felt comfortable cutting out the pattern pieces as they were because I personally fit into the sizing categories set by patterning companies. If you know your measurements are off from those listed, this is a good opportunity to alter the pattern. This can be accomplished by using a marker to mark lines between sizes to achieve what you need.
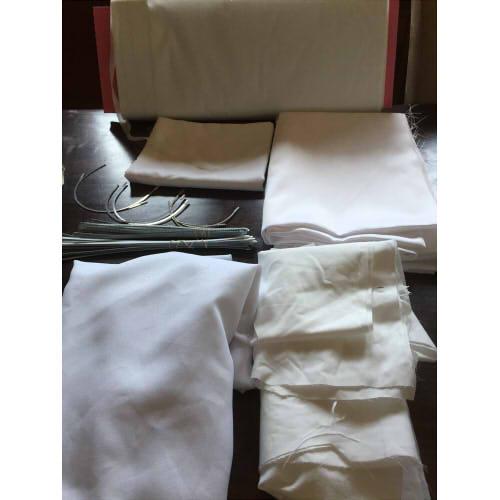
Besides the pattern, the most important components of making a corset are going to be your fabrics, and boning/underwire. For this corset, I will be using heavy bridal satin for my fashion fabric, cotton broadcloth for my underlining, and some silky lining fabric as my lining.
As for the boning and underwire, I bought them from CorsetMaking.com. The pattern will tell you what size and length of boning you will need, but if you alter your pattern how I did, those lengths will change. For example, I altered the back of the corset to not rise at the top, and instead of needing the 16 inch boning, I just went with the 12.5 inch. If you are just starting out with patterns in general, I recommend just doing the pattern as is, or making a mock up. If you are going to make a mock up, make sure to use fabrics with a similar weight to get a better idea of how it will drape.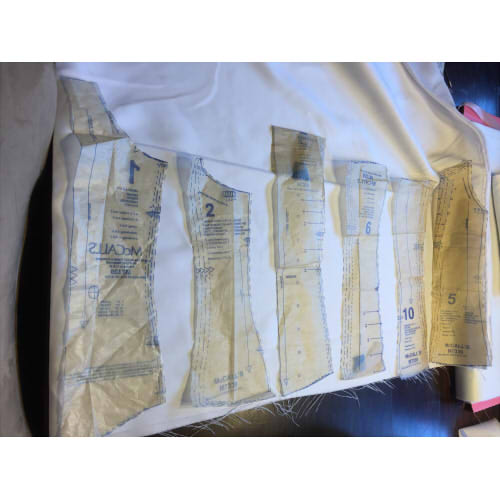
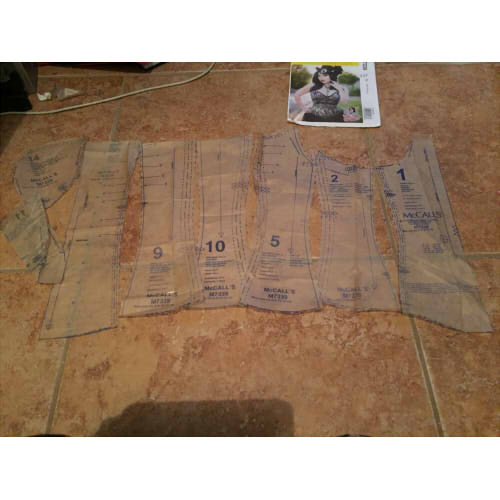
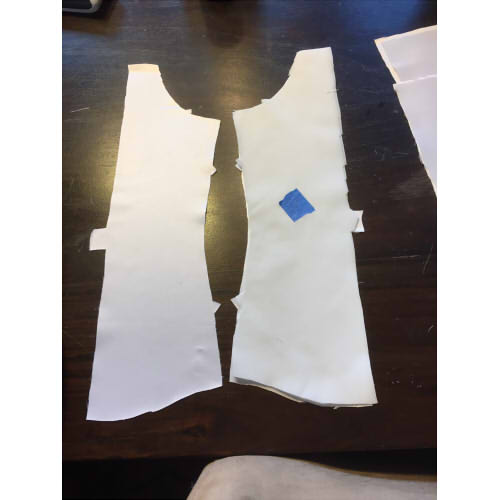
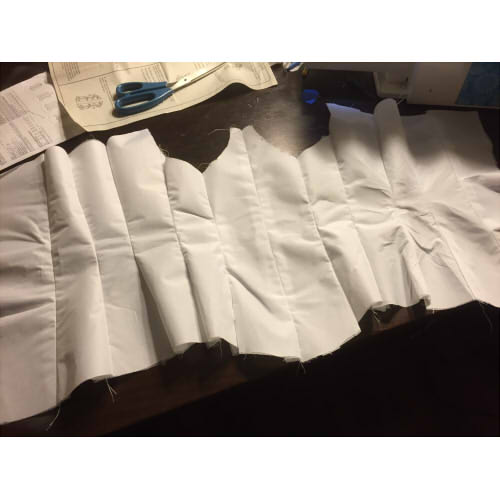
Once you have all your materials assembled, it’s time to cut your fabric! You can either pin your pattern pieces to the fabric, or use pattern weights. I’m personally a bigger fan of pattern weights, as they take less time, and leave your pattern pieces in better shape. An important thing to note here is cutting out the notches (the triangles on the edge of your pattern pieces) as those will help you in matching pattern pieces later. If you are using a patterned fabric, it is important to put some thought into how you will be cutting it, for example, making sure that stripes are all going the same way.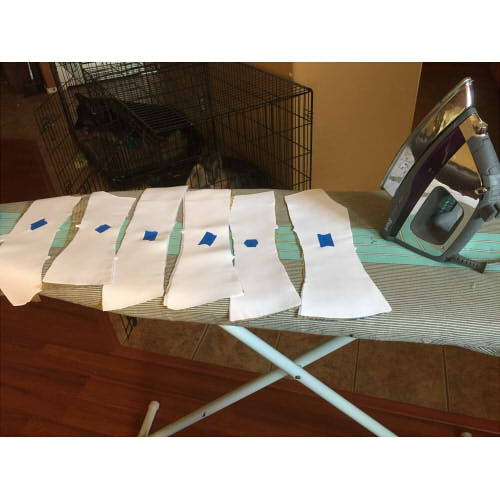
Here you can see the pieces notched, and labeled. I just used plain blue tape to number them all since with corsets in particular, all the pieces can look more or less the same. Also pictured here is my iron. Ironing between every step in sewing something makes a bigger difference than it might seem, and I’m getting off to a good start here by ironing out all my pieces before I even get started in sewing. Make sure to take note of your iron settings depending on the fabrics you are using.
Underlining (or flat lining) in a corset is important because part of its job is to absorb the wear and tear so that your fashion fabric will last longer. It differs from interfacing because you underline every piece, but you only interface certain parts that might need extra structure. The underlining pieces are attached to the wrong sides of the fabric, and then they will be used as the same piece for the remainder of the project. Use a basting or long stitch to attach the pieces.
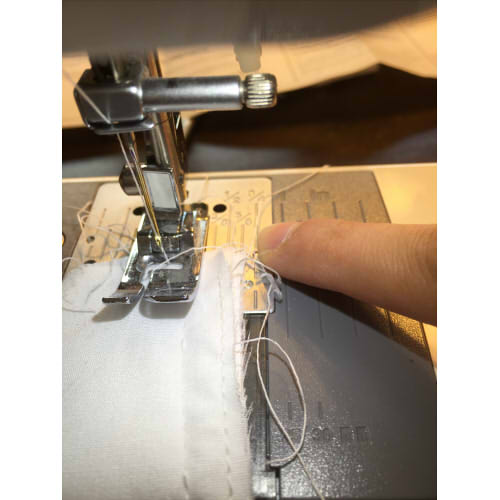
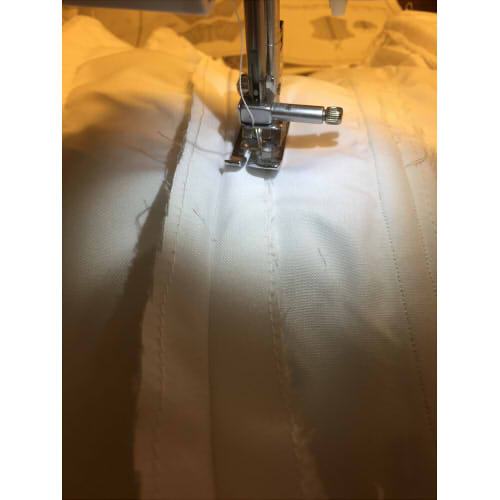
Once you’ve underlined all the pieces, it is time to start sewing. The first pieces that are going to go together are number one. It is important to take a note on the seam allowance in this pattern as part of it uses 5/8″, and then another part of it uses 3/8″. If your machine has guide lines, they are a great way to keep your seams straight as you watch the edge of the fabric go along that line as it is sewn. This part of the pattern is sewn at 5/8″ of an inch as shown here. If your machine does not have guidelines, masking tape can make a good place holder.
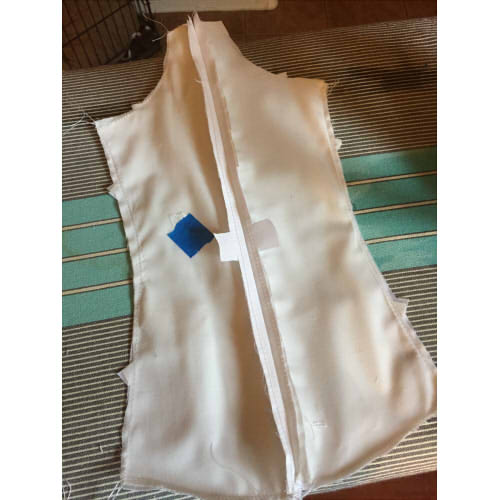
As you sew your pieces, it is really important to press your seams! Not only does it make everything look neater, but when it comes to corsets, this is going to be your casing for your boning down the road. And you will be thanking yourself later when you’re sewing them down and they are lying flat for you. The pattern will tell you how to press them, and in which direction. Also, here you can see how nicely the notches line up and keep things looking neat, as well as guiding where you should line up your pieces together.
After you’ve gotten your outside corset all sewn up, the next step is to get your lining done. It is done the same way as your outside fabric, except this time you are just going to press your seams open, and put it to the side. The lining not only serves as another layer of defense to your fabric, but it will also keep the inside of your corset looking neat and tidy.
It’s time for casing! The casing was one of the most fun and interesting parts of this project for me because I was trying very hard to make sure that the stitching would come out just so on the outside of the fabric because for one, my fabric in particular was a little unfriendly in that it was going to show any hole pierced through it! But I had a very handy trick to help me out here. Whichever side of the foot was closest to the seam, I would sew and make sure that there was a set distance between the foot and the seam so that the stitching would come out evenly against the seam.

It is really satisfying to get that nice straight stitching on the outside of a corset. Another note here would be to sew slow. Corsets look as good as the time you put into them. And it can be clear if you are rushing through it in how the stitching looks. Here, you can flip your corset over to work on the right side of the fabric, and go back over the stitches you just sewed down.

After all the casings are finished, you’ll want to grab your finished lining, and attach it to the fashion fabric, right sides together. Here, I lined up the last seams between them before sewing so that when I turned it out later, it would be easier to line up seams throughout the whole corset without bunching. For this step, you just need to sew up the sides of the corset, and then turn it out, and press. Only sew up the sides of the corset. Leave the top and bottoms alone, as they will be finished later.
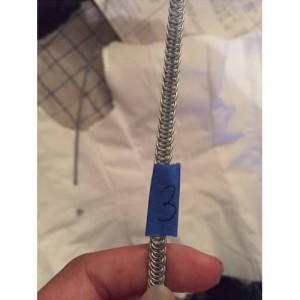
Now it’s time for boning! For sewing in general, it’s a good idea to have a plan before jumping that in. For corsets, a good plan would be to number the boning to know where it will go in your corset. For flat boning, you can just write directly on it with a marker. For the spiral boning, a bit of masking tape will do the trick. Just slide your boning into the channels you made, and your corset will be on its way!
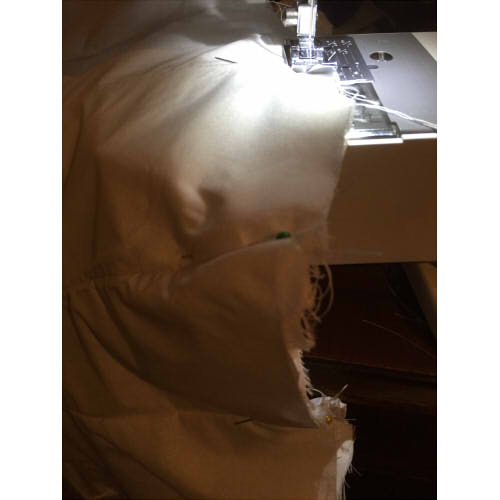
After you put in your boning, it’s time to live in fear of breaking your needles! Luckily, I only ended up breaking one with this corset. That is part of what makes basting the lining and outer fabric together even more useful. Once you are done, you’ll have a useful guide line for where it will be safe to sew and not hit boning. Here I lined up the seams as I was sewing, and went slow to make sure my needle wouldn’t hit the boning. If you’re using steel and it comes down to the needle or the boning, the boning will win every time.
***Using Bone Casing and sewing both sides of the casing before inserting the boning is the best way to save your sewing needles. You can sew down the two sides of the casing from the inside, there are divots you can follow on the casing. Or, use a quilting guide attached to your presser foot and set the correct distance away from the first seam to use the guide from the face side. ~Amy***

This is the point where we will be using 3/8″ seam allowance. This will apply to everything having to do with the cups on this corset from here on. If you’re not going to be cupping the corset, you can skip to finishing it at this point.
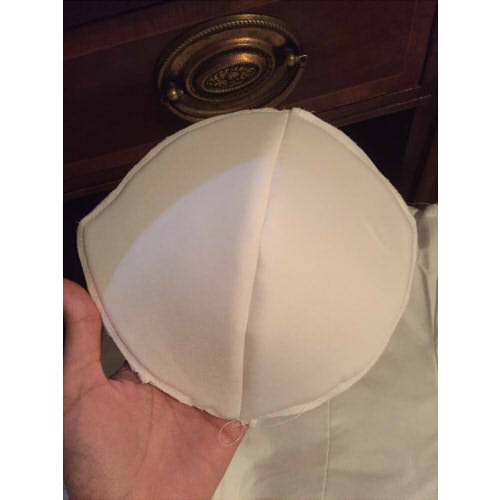
Like with the rest of the corset, you’re going to be basting the lining and the fashion fabrics together wrong sides together. The purpose of this is that since We’re going to be finishing this corset with a trim, turning it out will just add a lot of bulk to the seams. A difference here though is that the cup pieces will not have underlining. Instead, they will have the foam interfacing sewn in.

Sewing a curve to a curve can be daunting and messy. Luckily there’s a notch to make it a little easier, but it is still kind of a pain. The best way to do it is pinning it since by this point having the whole corset involved can make this whole process very cumbersome. It is really important to go slow and guide the fabric and remember to be careful in particular when going over the boning channels. When it’s done, the seam might look a little messy but luckily, that will be all taken care of in the next step.
***Before sewing and pinning, on the interior or concave curve (on the corset) make small cuts about 1/2″ apart within the seam allowance. This is for easing the interior curve to the exterior or convex curve (on the cup). Make sure you don’t cut all the way to the seam line. This technique works on all curves: Princess lines, circle skirts to waistbands, curved ruffles to straight lines, hat crowns to brims, collars to necklines, etc… ~Amy***
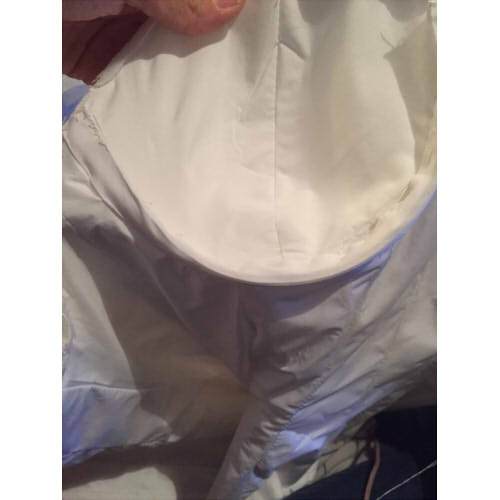
This next step will serve two purposes. One, it will clean up that ugly seam, and two, it will provide casing for your underwire. Here I used bias tape and sewed it in by hand. Doing it by hand has a lot of advantages. For one, you have infinitely more control in what you are sewing. Doing it by machine can lead to accidentally going too fast, and ending up in a lot of seam ripping. Another advantage is that in this case, it’s easier to manipulate than trying to shove everything through the machine and get it to look nice on the outside of the fabric. When your casing is done, just slide in the underwire, and sew the ends shut so it can’t slip out.
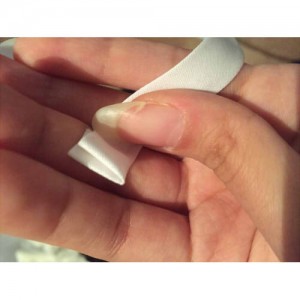
We’re nearing the last steps here! I am personally very excited to be this close to the finish. One of the last steps here is to finish the raw edges of the corset. Again, here I’m using white bias tape, and folding up the edges for a neat finish. Here you can just sandwich the corset edge in between the bias tape, with the narrower edge on the outside. This is another important place to go slow keep the needle by the edge of the bias tape so it looks neat.
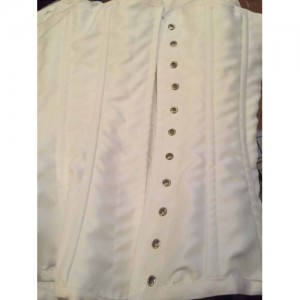
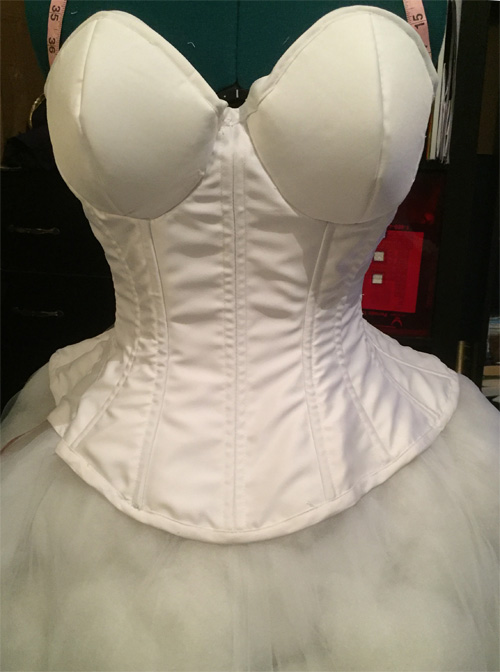
The very last step is adding in the grommets. There are a few ways to do this. I went with using a pair of grommet pliers and two part grommets/washers. For this, I made very small marks on the lining using the pattern piece for the back to dictate placement, and installed the grommets. It was a simple process of making small holes where I needed them, and putting in the grommets. How good it came out is worth how sore my hands got after all the squeezing I had to do here.
I have to say here that this pattern was definitely a learning experience. Doing all the extra little important things that I don’t normally do when I sew really made that extra difference in how in how the corset came out, and it’s something that I am proud of. I can’t think of much I would do differently but I would absolutely recommend doing a mockup if you’re unfamiliar with corsets.
All in all, I really liked this pattern and it gave me some good experience for the next time I draft my own!
I would rate myself as having moderate sewing experience. I’ve been sewing for a few years now and I’ve gotten a couple of awards but I’m still not quite where I want to be. I’m mostly self taught but I have taken a course in costume sewing. I thought the pattern was more geared to someone with at least some sewing experience because while it did have some good tips, it didn’t explain techniques and I felt it kind of assumed you sort of knew what you were doing. But I feel that a beginner could handle it if they really thoroughly read the instructions before hand. Personally, I had to actually do the things I wasn’t quite understanding to have the Aha! Moment for things that I didn’t quite get.
Article and Photographs ©Jack Spicer
Used with permission by www.MakingItYourself.com
~Thanks for the tutorial Jack, I’m sure people will find it helpful in deciding what pattern to buy and in constructing it.
~Happy Sewing, Amy


Oh my gosh! Thank you! Would love to see one of these for a boned bunnysuit!
Two questions: Wouldn’t using an awl be better than punching holes through the fabric? An awl works by spreading the fabric threads apart instead of cutting them, thereby weakening the material. It’s tricky, but you end up with a stronger corset.
Also, why don’t you mention flossing? Flossing keeps the bones from shifting inside the case and adds a beautiful embroidered look to the finished corset.
Since this corset doesn’t have a busk the only place you would use an awl instead of a punch is for the grommets. An awl isn’t good for larger holes like grommets, if the fibers have to push too far out the face of the garment tends to warp and not lay flat.
Flossing: I love the look of it. It began before “bone casing” was created, so it is un-necessary as a protection of the face fabric anymore. As a decorative addition, it does add an historic look and if you have the time to add it to a corset, please send us photos. I’d love to add them to our customer gallery.
Thanks,
Amy