| 10am - 5pm Mon - Fri

0

Boning Remnants Restocked ...Click Here »

Happy Spring… Look Who’s Back! :)

Hello CorsetMaking Enthusiasts, and Happy Spring!

Sorry about the long silence on our  blog…  we’ve been hard at work on many new site features, and we are determined to create more frequent blog posts to keep you updated and informed of them!  A major overhaul of the website is in the works — new categories, tutorials, projects, and many, many more products!  There are a few new product additions that will hit the shelves before the big launch, so stay tuned…  during the next newsletter and blog post we’ll be announcing some new offerings that have been on our list of most requested items!

New Arrivals:

• Underwire Channeling is back and better than ever!  Along with a fresh restock of white channeling, we are now offering nude channeling in the professional quality you’ve come to expect!
https://corsetmaking.com/bra-underwires/BMS-CH03.html

• New Bijoux Pattern Company patterns.  Bijoux Patterns are a smaller, lower cost version of some classic Laughing Moon patterns.  Perfect for customers making corsets for fun or costume dress, without as much need for the extensive pattern notes, construction notes, bibliographies, and resources offered in the original Laughing Moon versions.  The first two patterns are based on the Laughing Moon’s #100 pattern:

Bijoux Patterns #1: Ladies’ Victorian Pattern
https://corsetmaking.com/laughing-moon-patterns/CMS-P-LMBP1.html

Bijoux Pattern #1

Bijoux Pattern #1

Bijoux Patterns #2: Ladies’ Victorian Bust-Gore Pattern.
https://corsetmaking.com/laughing-moon-patterns/CMS-P-LMBP2.html

Bijoux Pattern #2

Bijoux Pattern #2


• Updated: A slightly revamped version of the Push Up Bra Cup will soon be replacing the original design. The little tabs that were once on the side of the cups are now replaced with a nice curve. A much cleaner look, and easier to incorporate with more patterns.  Currently in Size 8 only, but soon to replace all sizes of our Push Up Bra Cups.

As always, feel free to contact us with any questions, requests, tutorial ideas, and especially pictures of the wonderful creations you’ve made!

Posted in News & Updates | Leave a comment

Halloween Countdown!

With less than a week to Halloween we hope that you are all finished (or at least nearly done 😉 ) with the amazing costume creations you have been furiously constructing!

If you haven’t started, and I know there are some of you out there, we may be able to help… we have decided to have a final blowout sale of our last remaining costume patterns to free up shelf space for new arrivals.  All costume patterns are now 50% off until they’re gone; and they ARE almost gone!

https://corsetmaking.com/category/costume-patterns.html

https://corsetmaking.com/category/costume-patterns.html


Please remember to send us some pictures of your Halloween finery… we’d love to see what you’ve created!


Posted in Specials & Promotions | Leave a comment

November Newsletter

Posted in Archived Newsletters | 5 Comments

New Arrivals For Our Bra Makers!

It’s a happy day for our Bra Makers…  Beverly Johnson has been quite busy and we are very pleased to offer a bunch of new products to show for it!

The indispensable Bra Makers Manual is back in stock in both book and CD formats.  Also available is the new Bra Makers Manual Volume 2 with even more techniques and information for our more advanced bra makers!

Bra Makers Manual Volume 2

Bra Makers Manual Volume 2

For the rest of this month we will be offering a 10% off coupon for the book versions of both the Bra Makers Manual and Bra Makers Manual Volume 2.  Just use the coupon code “BRA-TASTIC” during the checkout process and your discount will be applied!  Also check out the other great new titles by Beverly Johnson in our Bra Making Books & Videos section!

Posted in Bra Making, New Arrivals | Leave a comment

Shipping Concerns

Throughout the years many people have asked why we do not offer shipping options lower than Priority Mail, or why we can’t just send some of our smaller items in a plain letter envelope.  Well, the answer is for the benefit of our customers!

First, Priority Mail and Express Mail (which we offer if needed) are the most reliable options the US Postal Service offers. We have tried other services and found that orders too frequently ended up being delayed, lost or even “destroyed.”  As for letter envelopes, letters are processed differently than packages.  Letters can easily be hooked or snagged by the sorting machines if the envelope has anything lumpy in it.  This has the potential to not only  damage the item you are sending, but also the surrounding mail that was packaged properly.

We want you to receive every single item that you ordered.  We want your package to arrive not only in a timely manner but also in the same perfect condition that it left our hands in. We have recently been able to lower both our shipping prices and our order minimum to help you keep your costs as low as possible.

Below is an example of a recent exchange that we “almost” received.   The items were sent back in a standard letter envelope, and unfortunately none of them actually made it.

Posted in Shipping & Customs | 12 Comments

Alanna’s Wedding Dress

“Your website is wonderful. This was my first time sewing a corset, and it just happened to be for my wedding dress (no pressure). Your site had everything I needed, and I was thrilled with the results I got after modifying the Laughing Moon pattern a bit. I’m now inspired to make a few more just for fun.”

-Thank you Alanna, your gown came out beautifully.

Posted in Customer Creations! | 3 Comments

Tips & Tricks: Corset Lace Tipping

The heat shrink lace tipping is a 3/32″ diameter tipping that you “roll” the ends of your lacing through. Then by applying heat to the tipping it shrinks around the end of the lacing forming a tight bond. We have found a lighter or candle works great for this purpose. If you are using the poly lacing supplied at Corsetmaking.com, the trick is to heat to the point that the lace will actually begin to bond with the tipping forming a permanent seal. Neat stuff!!

Caution: Be sure to keep your heat source far enough from the tipping that you don’t discolor it… especially the clear tipping that can easily discolor if flame is too close.

If you work with continuous Flat Lacing from a spool, or if you want to shorten your existing laces, you will want to tip your laces for the ease of lacing and to keep the ends looking more professional and tidy. Lace Tipping is easy to use and inexpensive. (Round Lacing doesn’t compress, so it won’t fit into the Tubing.)

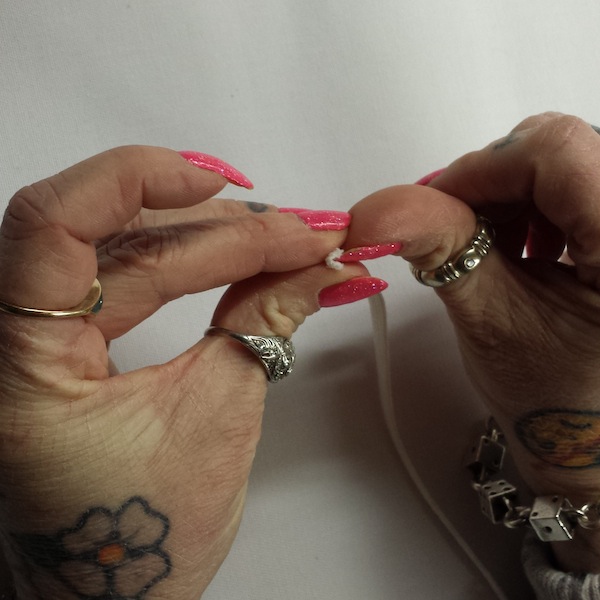
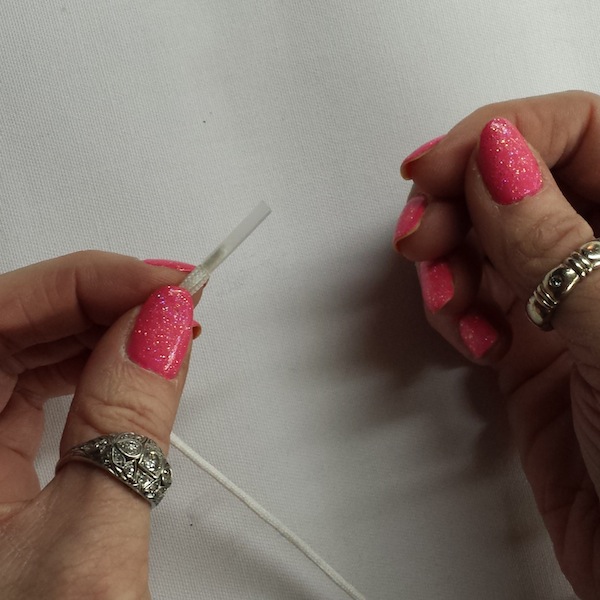
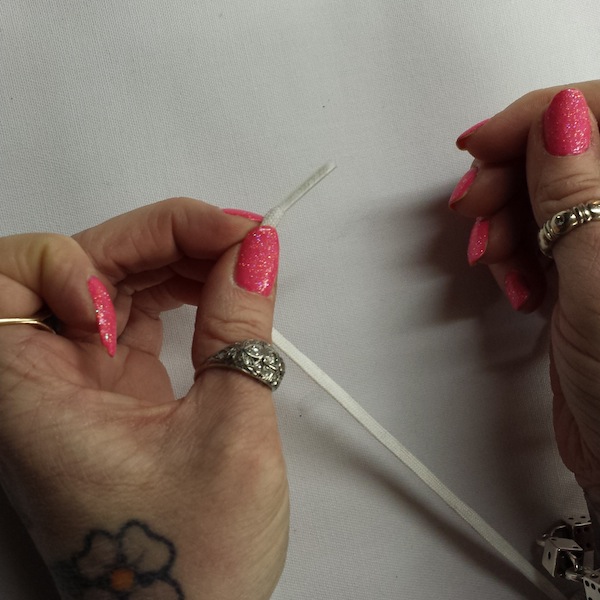
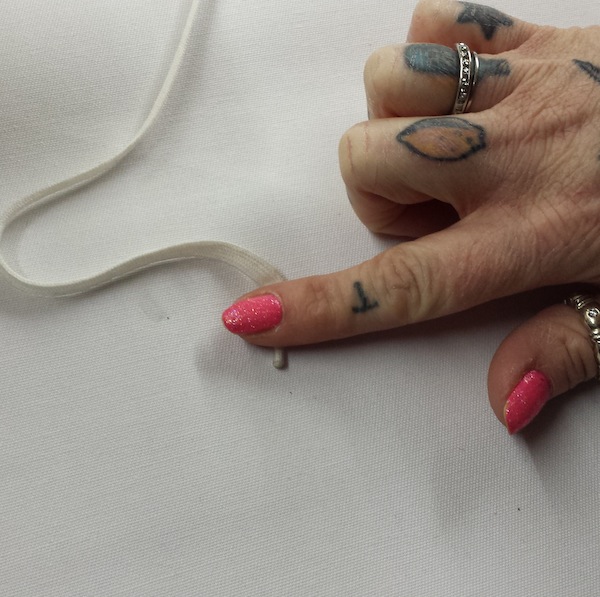
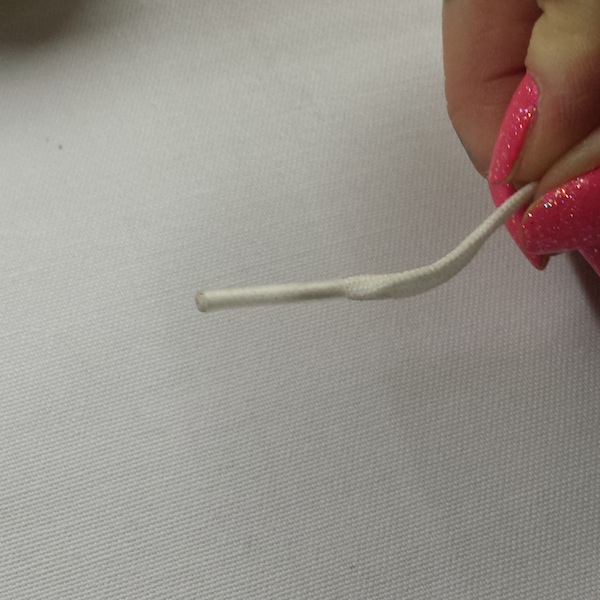
Cut your tips, about 3/4″ long. You can fold the lacing in half and roll it back and forth between your fingers to squeeze it tight and small. Push the lace into the tubular casing while you twist it  in the opposite direction around the lace.

20150220_151908  20150220_151919

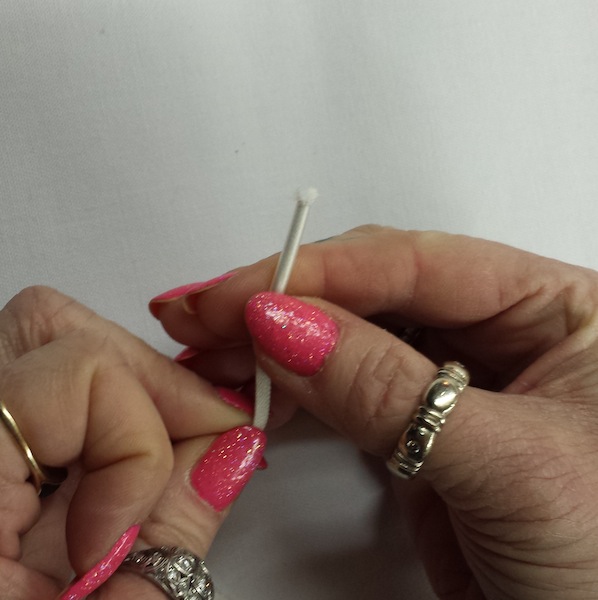
20150220_151936  20150220_151948

Once the lacing is through the lace tipping, trim off any frayed ends and leave a small amount of lacing exposed, about 1/8″ or a smidge less. (If you are using 100% cotton lacing there is no need to leave any lace sticking out of the tube, it will burn not melt.)

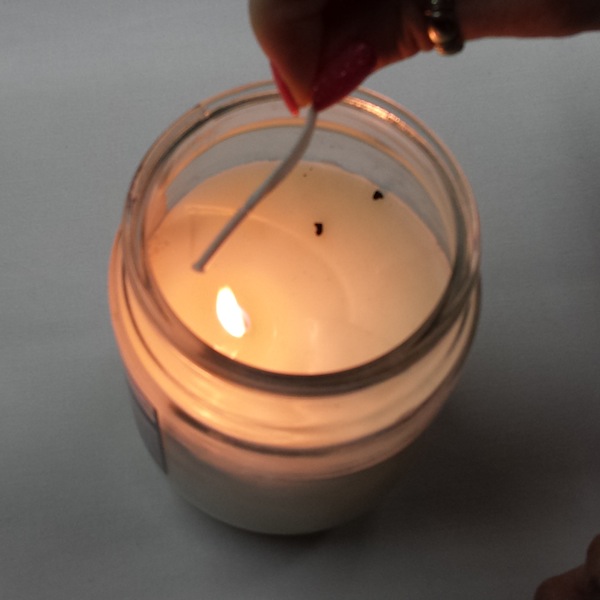
You can use a candle or a lighter to shrink the tip. If you are using a lighter you have a higher chance of burning yourself, you need to keep the flame going for a few minutes, be careful. When using the clear tubing on white or ivory laces, hold the tubing farther away from the flame to avoid discoloring the tubing.

Place the tip over the flame about two inches away. You don’t want to melt it too quickly, or burn it. Twist it slowly so that it melts all around. Gradually move it closer to the flame if it isn’t shrinking/melting. The small amount of exposed lace at the end will melt into a ball and help secure the tubing onto the lace.

20150220_152000  20150220_152013

The tip will be hot so be careful. If it starts to curve you can place it on a flat surface and roll it back and forth so it cools and dries more straight.

20150220_152030  20150220_152039

*Yes, there are different ways to get the lacing into the tip. You can put a couple stitches in the end and put the needle through the opening, then gently pull the lacing through, being careful not to break the thread. You can use a pin to push the lacing through. I’ve tipped a huge number of laces and the method I showed above is the quickest/easiest for me. There are also different techniques for using heat to shrink the lace tipping. Again, this is the best and quickest way we’ve found. Not to mention the least likely to cause a burn on our much needed fingertips.

~Happy Corseting, Amy Delicious

Posted in Tips & Tricks... | 3 Comments

Tips & Tricks: Applying Boning Tips

If you buy continuous rolls of spiral steel you’ll need to tip the boning that you’ve cut so that it slides smoothly into your casing and it doesn’t harm the fabric with sharp edges. These tips also work great on Hoop Boning, making the hoops slide into the long channels without catching on threads or seam allowances.

The best way to keep your tips from falling off is to crimp the tips before they are on the boning. (Wait, what? I’ve been trying to crimp them while on the boning for ages, and they always fall off… )

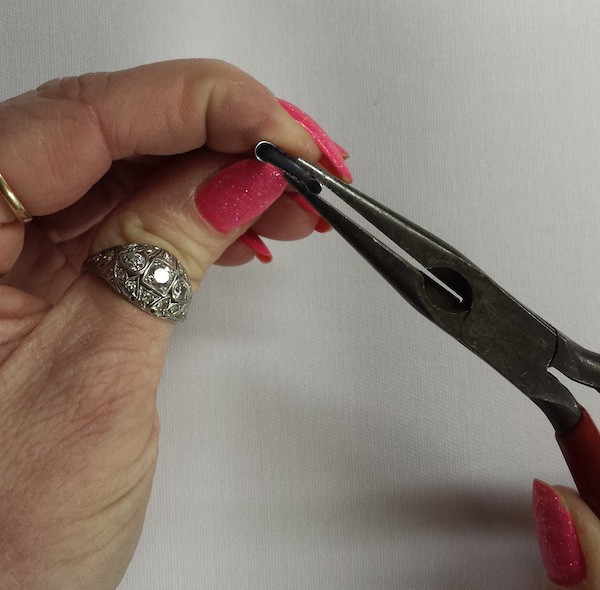
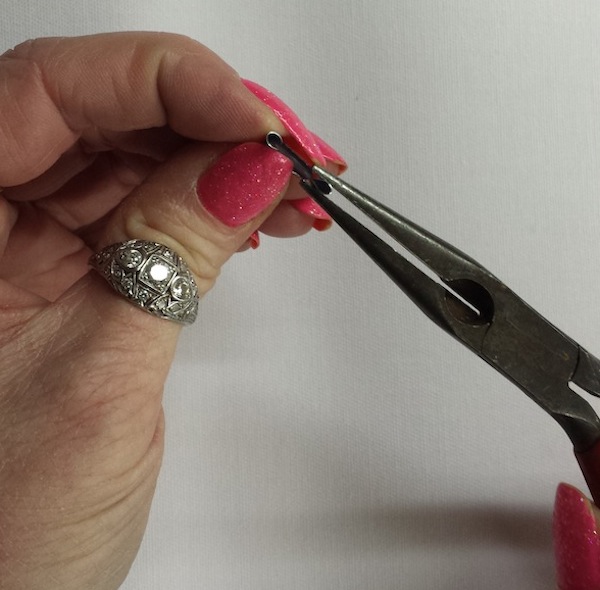
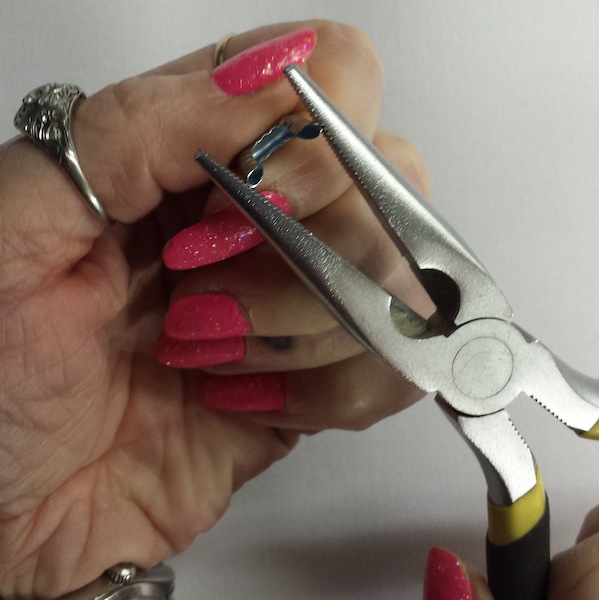
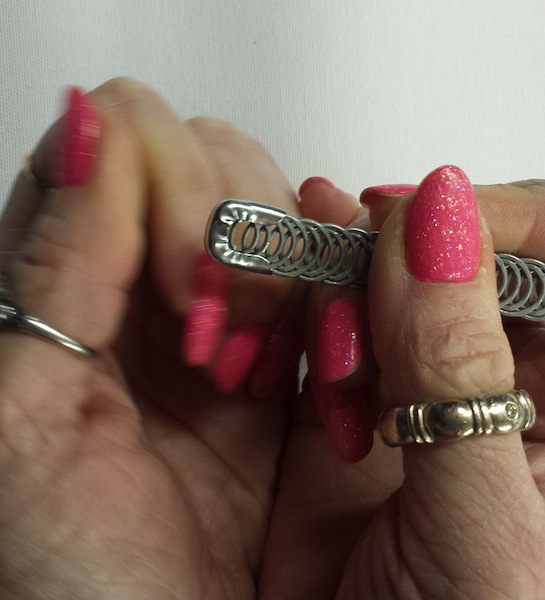
It’s easy to do with needle nose pliers. Start by crimping each of the sides partially closed. If you squeeze too much, use a flat head screwdriver to wedge it open a bit. (You probably have that screwdriver handy to change needles in your sewing machine.)

20150218_160607 20150218_160620

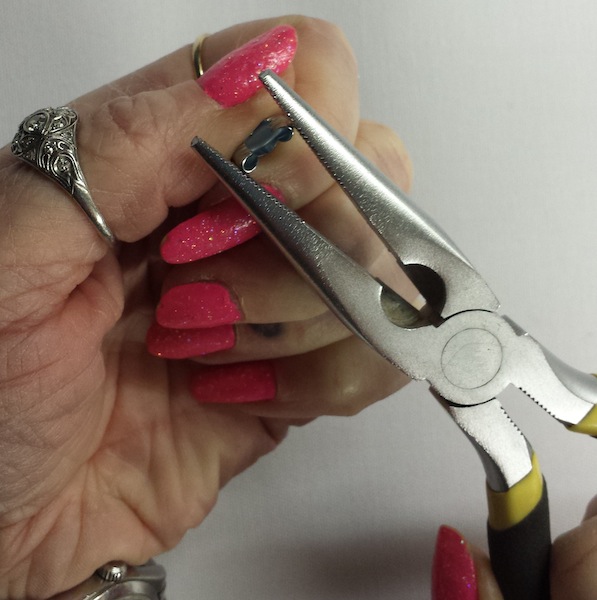
Next, squeeze the two sides together. I always squeeze them, and then test them for fit. If they are closed a “smidge” smaller than the width of the boning it may be more difficult to get onto the boning, but will stay on nice and tight. You can always use the pliers in the opposite manner and pry the sides out a bit. Put the closed pliers in the gap and pull open.

20150218_160633 20150218_160636

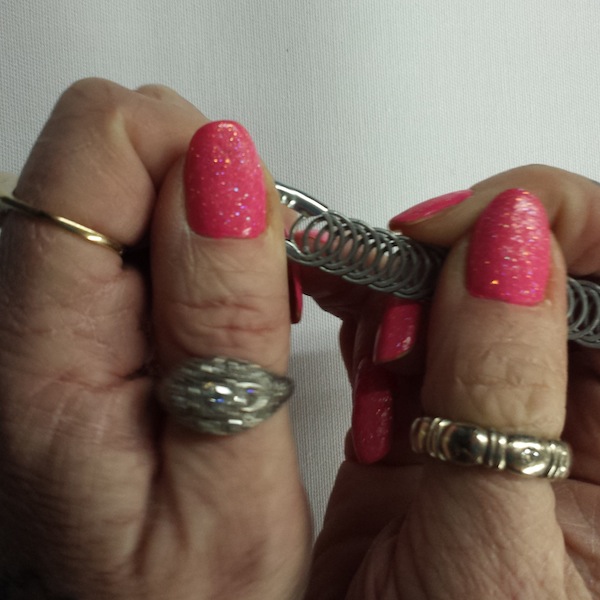
When you put the tip onto the end of the boning it should be tight. Work from one side to the other and cram it on. You can crimp it more after it’s on, but if it’s tight you won’t need to. Lay the piece of boning onto the outside of your corset over the channel it will go into before inserting. It’s easier to adjust the boning now, than try to pull it back out with the tip still on.

20150218_160651 20150218_160655

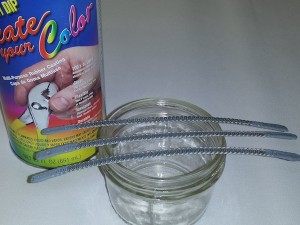
You can also use bone tipping fluid on your cut boning ends. You will need to dip the ends and balance them on something so they don’t stick to your work surface. Wait till they dry, and do it again to get a thorough coating.

20150219_103248
Another tip: If your using hoop boning, put a drop or two of fabric or craft glue on the boning before you put the tip on, let it dry and it will be even more solid.

~Happy Corseting, Amy

Posted in Archived Posts | 4 Comments

Bridal Corsets from Delicious!