| 10am - 5pm Mon - Fri

0
BASKET   0
ACCOUNT

Your shopping cart is empty.

Boning Remnants Restocked ...Click Here »

Setting a 4-Part Snap

Snaps2

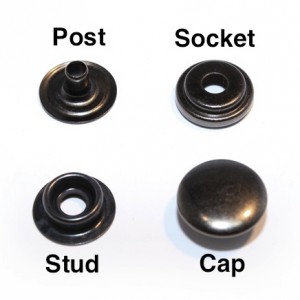
Snaps have 4 parts. The first piece is the Post that is flat with a narrow tube sticking up. This will be the back on the wrong side of the fabric or garment. The Stud attaches to the Post. The Cap is the decorative visible portion of the snap and it attaches to the Socket.

There are a few different types of snap setters: Snap Setting Pliers, a Snap Setter Kit that requires a Rubber Mallet, a three piece Die Set* for a Hand Press (for Size 20 snaps) and a four piece Die Set for a Hand Press (for Size 24 snaps.)  The Hand Press method is the one we use, so that’s the one I have instructions for below.

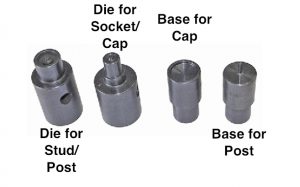
When using The Hand Press with a four piece Die Set these are the pieces:
4PartSnapDies

To Set the Cap and Socket in the Hand Press:
The Base Die for the Cap is placed in the bottom hole of the Hand Press and tightened with the allen wrench. The Top Die for the Socket is screwed onto the top portion of the Hand Press, you may need to adjust how low or high you screw it on, depending on the thickness of the fabric or leather you are using. Always do a test snap first.   

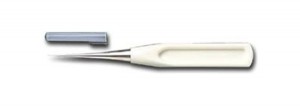
AWL Leather Punch

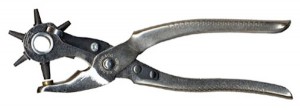
You need to make a small hole in the fabric/leather with an Awl or a Leather Punch to insert the snap.
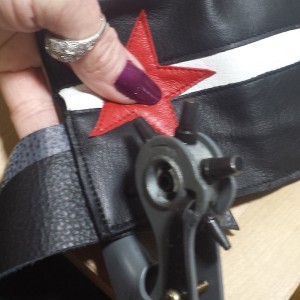
I love the Leather Punch, I set it at ‘3’ and it cuts a perfect hole for the size 24 Snaps. I always put a scrap piece of leather down under the fabrics I intend to cut through, it cuts a much cleaner hole.

HolePunch HolePunched

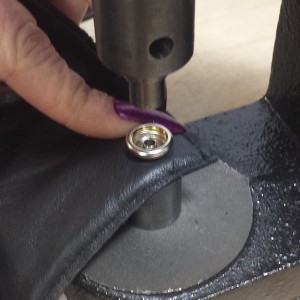
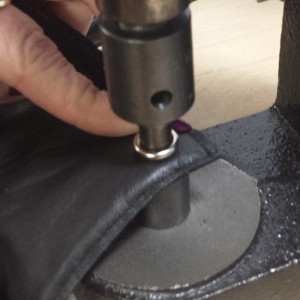
Place the Cap through the hole in your garment from the right side and flip it over onto the Cap Die, then place the Socket on top. Bring the arm of the press down making sure that the Socket Die lines up with the center of the Cap so that it crimps evenly. 

SetCap1 SetCap2

SetCap3 SetCap4

To set the Post and Stud using the Hand Press: 
The Base Die for the Post is placed in the bottom hole in the Hand Press and tightened with the allen wrench. The Top Die for the Stud is screwed onto the top portion of the Hand Press, again,you may need to adjust how low or high you screw it on, depending on the thickness of the fabric or leather you are using. It’s always good to do a test first.

You need to make a small hole in the fabric/leather with an awl to insert the Post.

SetPost1 SetPost3

SetPost4 SetPost5

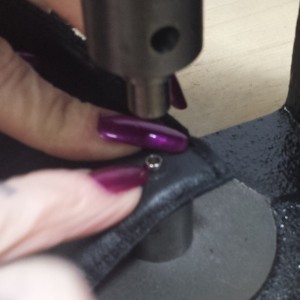
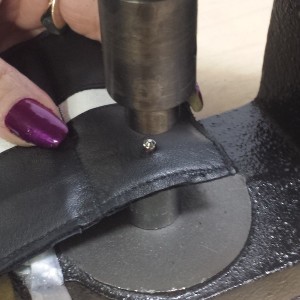
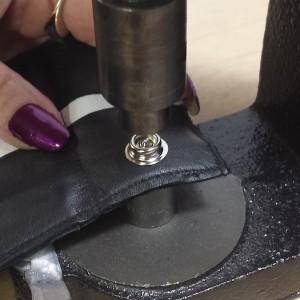
Place the Post through the fabric or leather hole you made and then put it onto the Post Die,  place the Stud down next. Bring the arm of the press down making sure that the Stud Die lines up with the center of the Post so that it crimps evenly.

SetSnap

Tips: Set all of the one side first, meaning, once you have the dies set to set the caps, set all of the caps you intend to set. Do a test first, then set them all. When you change the dies, do another test and make sure the test snaps -snap together and apart correctly. Then set all of the opposite sides.
~Make sure the crimp is tight enough, if not it will stand up too high and not allow the snap to close. Don’t over crimp or you can damage the Stud, Socket, or Cap. 
~Snaps are tight at first, they take a few snappings-un-snappings to start off.
~Reinforce your fabric before setting snaps!  Use a circle or square of fusible interfacing on each of the fabrics at the location of the snap. Put an extra piece of thicker fabric, felt, or leather in-between to stabilize the snap.
*To use the Three Piece Die Set for the Hand Press, the same Base is used for the Post and the Cap.

~Happy Snapping, Amy Delicious

Posted in Costume Making, How To, LeatherCrafting, Tips & Tricks..., Tools & How to Use Them | Leave a comment

Cutting Continuous Spiral Steel Boning

When you buy a continuous roll of boning you have the freedom to cut your pieces of boning to exactly the right length, as opposed to just rounding to the nearest half inch.You can work on your project according to your own time frame, you don’t have to know ahead of time exactly what sizes you will be using. If you make alterations in your patterns, you can cut the boning to the right size as you need it. You can also use smaller or longer pieces than are available pre-cut and tipped.

SpiralBoningCutter
Cutting spiral steel boning:
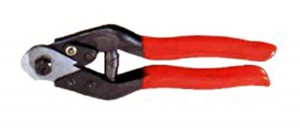
You will need a to use a specialty boning cutter. The blade is short, so it applies enough torque to go through the multiple steel strands in the spiral. There is a safety clasp to keep your cutters tidy in your tool bin.

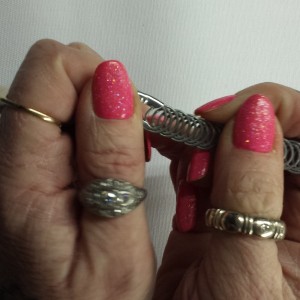
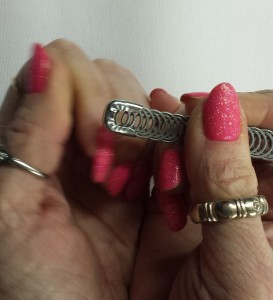
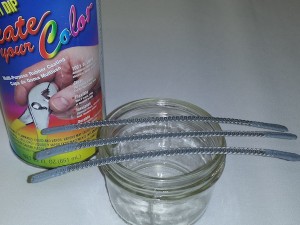
Use a marker to write directly on the spiral steel boning, or wrap a piece of scotch or masking tape around the boning and mark the length. The blade for the cutters is short, so you may need to cut it from both directions to get all the way through at the right length. Once you have cut the boning you will need to apply boning tips or dip the cut edges in Plasti-Dip. *If you don’t tip the edges you will increase your risk of the sharp steel weakening your casings and fabrics. The ends could push through the fabric and be dangerous.

SpiralMark SpiralCut SpiralAfterCut 20150218_160651

There is a complete tutorial here on tipping your newly cut boning.

~Happy Corseting, Amy Delicious

Posted in Corset Making, Costume Making, How To, LeatherCrafting, News & Updates, Tips & Tricks... | Leave a comment

Zipper too Long? How to Shorten a Zipper.

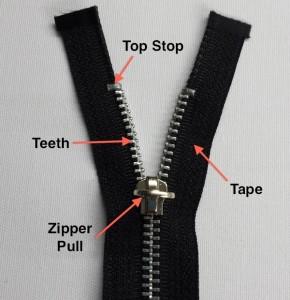
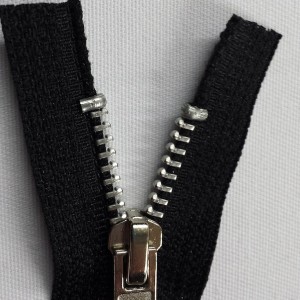
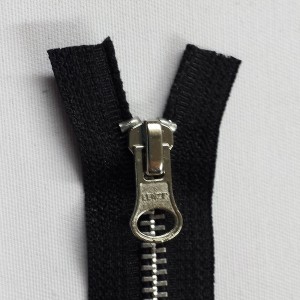
Zippers are only available in certain lengths and tape colors, which may stifle your designs. Some fabric stores will cut your zipper down to size for you, if you know exactly how long you want it while at the store. You can find most colors of zippers in 22″ lengths, but not-say-10.5″. If the zipper you have is too long, shortening a metal tooth zipper is actually easy, all you need is an Awl and a set of medium sized needle nosed pliers. You can purchase zipper pliers here if you are shortening quite a few zippers.
Zipper

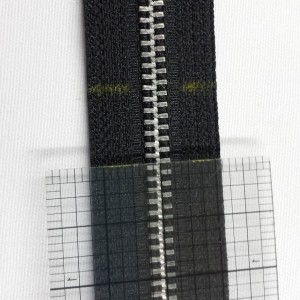
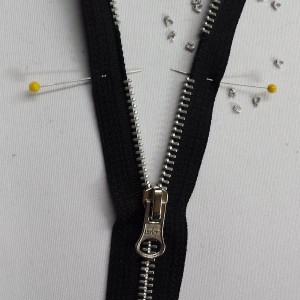
Measure how long you want the zipper to be. Mark the length with pins or with a chalk pencil on the wrong side of the zipper tape.
MarkZipper
You will need to remove the Top Stops and replace them so that your Zipper Pull doesn’t slide off the Tape.

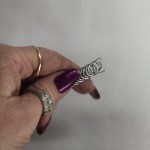
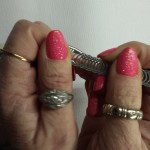
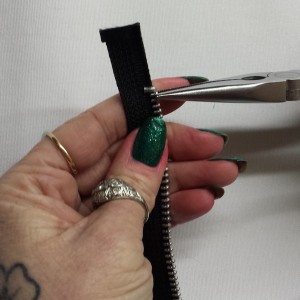
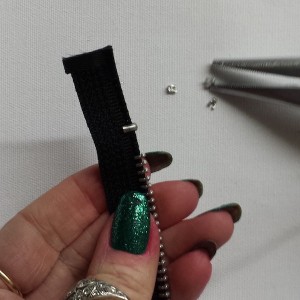
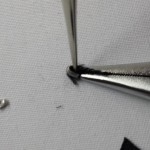
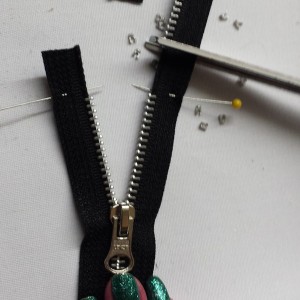
To Remove the Top Stops: Remove a few of the teeth starting at the top stop so you can cut the tape without damaging your scissors. Use medium sized needle nosed pliers or Zipper Pliers. Hold the tape firmly, grab one tooth tightly with the pliers and yank. Off it will come.

RemoveTeeth TeethRemovedTop

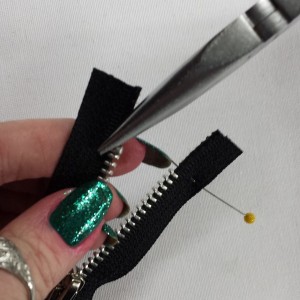
Removing the Top Stops is the most difficult part, but still fairly easy. Cut the tape off as much as possible on the top and bottom, hold the remaining tape with pliers and insert an awl into the curved part of the stop. Once it’s secure, push the awl in farther to pry the ends apart. The tape should come out as it opens. You’ll need the stop to be open far enough to go back onto the tape again. Remove both Stops.

CutTopStop AwlTopStop AwlTopStop3 AwlTopStop2

Replacing the Top Stop: Use medium sized needle nosed pliers or Zipper Pliers. Hold the tape firmly, grab one tooth tightly with the pliers and yank. Off it will come. Remove enough teeth so that you have about 3/4″ of ‘naked’ tape without teeth.

RemoveTeeth2 TeethRemoved

Cut the excess tape off.  Put your top stop close to the top tooth and crimp tightly with your pliers. Repeat on the other side. You can use glue, fray check, or melt the cut ends of the tape to stop them from fraying. Ta-da! Now you can have perfectly sized zippers to use in anything!

CutTape CrimpStop


FinishedOpen FinishedClosed

~Happy Zipping, Amy Delicious
Tip: Don’t throw the extra zipper tape away, use it as a piping in seams for a decorative look!

Save the teeth for the Zipper Tooth Fairy! Maybe you’ll get a nickel.

ToothFairy

Posted in Corset Making, Costume Making, How To, LeatherCrafting, News & Updates, Tips & Tricks... | Leave a comment

Grommets! What Should I Use?

Grommets and Washers are similar to eyelets used for reinforcing an eyehole in fabric. Grommets are metal tubes with a flare on one side. The Washer is the flare without the tube, or washer. When put through an eyehole in fabric, the tube of the grommet gets pressed with a die and rolls around the washer. They are much sturdier and offer a cleaner finish than one piece eyelets. You may need to reinforce your fabric if it is lightweight so that the grommet doesn’t pull through the hole.

We offer different tools at different price ranges for setting grommets. Which you choose has to do with how many grommets you plan to set. If you are making one costume with lacing down the back, one of the cheapest options will most likely work for you. If you are making multiple pieces, or you know you’ll find more uses for the tool down the road you’ll want something more industrial, quicker, and versatile.

HammerKit0
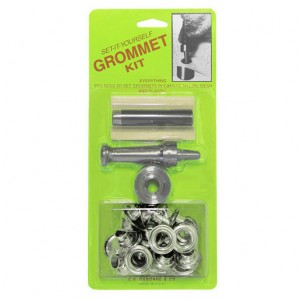
*Set it Yourself: Mallet and Die
–  This kit comes with four dozen grommets. That is enough to test a couple, then put grommets into a garment or two. It is available in Size 00 and Size 0, which are larger. You can order more grommets by the dozen or gross in a variety of colors for future projects. The kit includes a cutting die, cutting board, and the two part die/base to set the grommet. You’ll need a Rubber Mallet to use this kit. It is not recommended to use a hammer, you may damage the die.

After you’ve marked the location of your grommets, you place your garment over the cutting board and center the cutting die over your marking. (On a sturdy table or the floor) Hit the cutting die with a rubber mallet to cut a circular hole in your fabric or leather. Then place the base on a solid surface, and place the grommet onto the die. Place your garment onto the grommet with the right side facing down. Place the washer over the grommet onto the lining side of your garment and put the die into the tube. Hit the die with a rubber mallet until it has crimped fully and is tight. If you live in an apartment with downstairs neighbors, don’t plan on doing this at midnight.

OsborneKit

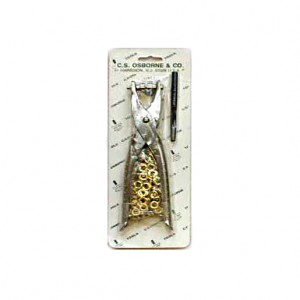
* Pliers – The Grommet Setting Pliers come with a gross of grommets, thats 144 to you and me. The kit has the pliers and a cutter. It is available for Size 00 grommets only. You can order more grommets in different colors by the dozen or gross. You will use the cutter to cut nice clean round holes for your grommets with either your own brute strength and twist back and forth or with a hammer onto a cutting board. It depends on what type of fabric or leather you are using. The pliers are fairly self explanatory, you put the grommet on one side, the fabric with the pre cut hole goes over the tube in the grommet with the face facing the grommet. The washer goes on next to the lining side, then you use both hands to squeeze the pliers closed, crimping the tube of the grommet onto the washer nice and snug. The pliers are quieter, for sure. They are more suited for lighter weight fabrics. If you have thicker fabrics or leathers you may want to go with the hammer and die technique so that you can get enough pressure to crimp the grommet.

HandMachine

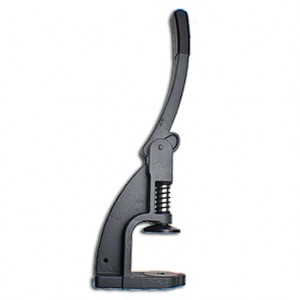
* Hand Setter – The table mounted hand setting machine is perfect if you have many grommets to set. It comes without dies. You can purchase the dies to set Size 0 Grommets, Size 00 Grommets, Size 5 Grommets, Size 12 Grommets (Giants!), Rivets, Covered Buttons, and Snaps. Dies can be found below the product here. You need screw it to a sturdy table.

For setting grommets, you will need to use an awl, cutter, or the cutting die to make the hole for the grommet. The bottom die has a spike of sorts that stands up, you place the washer over the spike, garment over the spike right side up, then the grommet. Pull down on the handle and it will crimp the grommet in place in a second. You may need to adjust the height of the top die up or down to make sure that the grommet is crimped enough for the thickness of the fabric or leather you are using.

~Happy Corseting, Amy Delicious
Posted in Corset Making, Costume Making, LeatherCrafting, Tips & Tricks... | 2 Comments

Lacing Tips: How to Tip Your Laces

If you work with continuous Flat Lacing from a spool, or if you want to shorten your existing laces, you will want to tip your laces for the ease of lacing and to keep the ends looking more professional and tidy. Lace Tipping is easy to use and inexpensive. (Round Lacing doesn’t compress, so it won’t fit into the Tubing.)

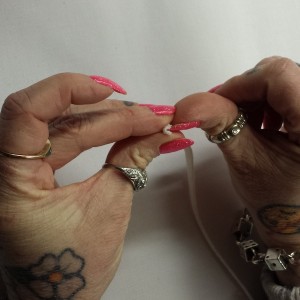
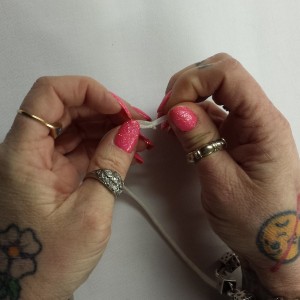
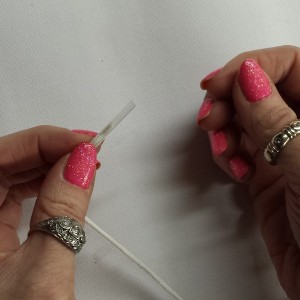
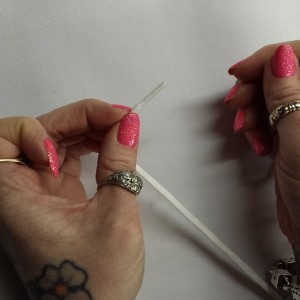
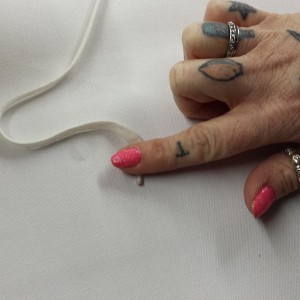
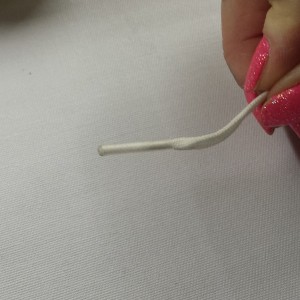
Cut your tips, about 3/4″ long. You can fold the lacing in half and roll it back and forth between your fingers to squeeze it tight and small. Push the lace into the tubular casing while you twist it  in the opposite direction around the lace.

20150220_151908  20150220_151919

20150220_151936  20150220_151948

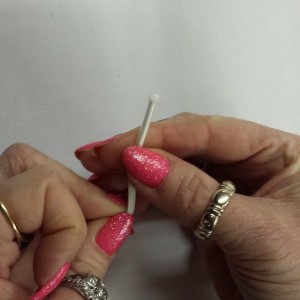
Once the lacing is through the lace tipping, trim off any frayed ends and leave a small amount of lacing exposed, about 1/8″ or a smidge less. (If you are using 100% cotton lacing there is no need to leave any lace sticking out of the tube, it will burn not melt.)

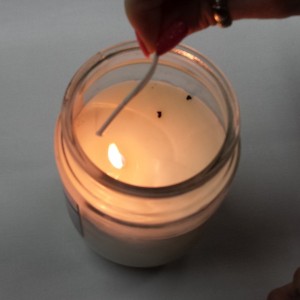
You can use a candle or a lighter to shrink the tip. If you are using a lighter you have a higher chance of burning yourself, you need to keep the flame going for a few minutes, be careful. When using the clear tubing on white or ivory laces, hold the tubing farther away from the flame to avoid discoloring the tubing.

Place the tip over the flame about two inches away. You don’t want to melt it too quickly, or burn it. Twist it slowly so that it melts all around. Gradually move it closer to the flame if it isn’t shrinking/melting. The small amount of exposed lace at the end will melt into a ball and help secure the tubing onto the lace.

20150220_152000  20150220_152013

The tip will be hot so be careful. If it starts to curve you can place it on a flat surface and roll it back and forth so it cools and dries more straight.

20150220_152030  20150220_152039

*Yes, there are different ways to get the lacing into the tip. You can put a couple stitches in the end and put the needle through the opening, then gently pull the lacing through, being careful not to break the thread. You can use a pin to push the lacing through. I’ve tipped a huge number of laces and the method I showed above is the quickest/easiest for me. There are also different techniques for using heat to shrink the lace tipping. Again, this is the best and quickest way we’ve found. Not to mention the least likely to cause a burn on our much needed fingertips.

~Happy Corseting, Amy Delicious
Posted in Corset Making, Costume Making, How To, Tips & Tricks... | 1 Comment

Lacing a Corset

We’ve all laced shoes before, right? Should be a no-brainer to lace a corset. Except that you need to tighten it at the waist, not at the top or bottom. There are many different ways to lace a corset, I’ll let you know about a couple of good ways.

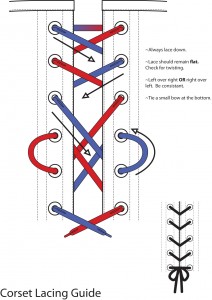
Standard Lacing: This is how we do it. We find it easier to work with alone or if a friend laces you up, it is very effective and aesthetically pleasing. The extra cross over at the waist allows for extra tightening at the waist and is more comfortable. You can have an even or odd number of grommets on each side and it works fine.

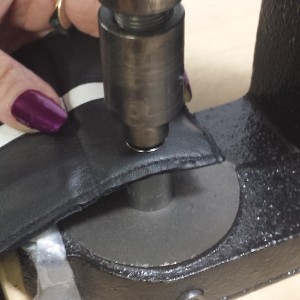
LacingGuideIllustrations thanks to Lindsay Waibel

The change in colors is used just to show which side is which, this is based on one single lace, see at the top where the center turns from red to blue.

Mark the waist line if you can’t see it easily, you will need two grommets on each side to be at your waist. You can use a straight pin either horizontally or vertically so you remember to stop at the waist.

Mark the half way point in the lacing with a safety pin.

Start from the top of the corset and bring the laces through the grommets from the inside (lining side) out. The safety pin will be centered while you lace the corset, and based off of the pin you will adjust the laces when you are finished. Cross the laces (left over right) and put the tip through the next grommet from the inside again. Repeat until you get to the waist line. Keeping the laces flat and not letting them twist makes for a more professional and neat looking corset. Yes, they will twist when loosening and tightening, but you can actually smooth them out much more easily if you start with tidy laces.

Keep it consistent. If at each place the laces cross each other the left side goes over the right (Or right over left) it will make a huge difference in the overall look. 

At the waist, skip a grommet still coming from the inside to the outside, but don’t cross the laces. On each side bring the lacing through the same side into the grommet you skipped. Don’t pull the lacing all the way through toward the bottom of the corset. Leave most of the excess lacing at this loop. This will be the loop you use to tighten the corset and tie it off at the waist. Again, cross the laces and proceed as you did before. When you get to the bottom tie off in a small bow. Even out all of the laces starting with the safety pin at the top down to the waist, then the bow at the bottom up to the waist. When you are finished remove the safety pin and tie all of the excess laces into a big bow.


X’s:
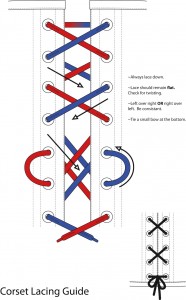
If you’ve seen a corset laced with X’s on the outside and alternate X’s on the inside it’s for tight lacers. When you lace a corset like this you can get the back edges completely closed, edge to edge, no gap at all. If you don’t intend to completely close your corset you do not need to use this method. You may choose to if you just like the look.

Lacing in this manner requires more forethought. Before starting, determine where your two grommets at the waist will fall. It is best if there is an odd number of grommets at the bottom of the corset.

If there is an odd number at the top start with the ‘bar’ on the outside. The following directions are for an even number of grommets at the the top. This way the ‘bar’ is on the inside.

Print

Illustrations thanks to Lindsay Waibel

The change in colors is used just to show which side is which, this is based on one single lace, see at the top where the center turns from red to blue.

Mark the half way point in the lacing with a safety pin. Start from the top of the corset and bring the laces from the inside (lining side) out. The safety pin will be centered while you lace the corset, and based off of the pin you will adjust the laces when you are finished. Cross the laces (left over right) and put them through from the face side (outside) to the lining side. Cross the laces again (left over right), this time put the laces through the grommets from the lining side to the face side. At the waist, skip a grommet and come from the inside to the outside, but don’t cross the laces. On each side bring the lacing through the same side into the grommet you skipped. Don’t pull the lacing all the way through toward the bottom of the corset. Leave most of the excess lacing at this loop. This will be the loop you use to tighten the corset and tie it off at the waist. Again, cross the laces and proceed as you did before. When you get to the bottom tie off in a small bow. Even out all of the laces starting with the safety pin at the top down to the waist, then the bow at the bottom up to the waist. When you are finished remove the safety pin and tie all of the excess laces into a big bow.

If you have an even number of grommets, your bow at the bottom will fall on the inside or lining side of the corset.

“Can’t I just lace it from the top to the bottom and not put a loop at the waist? It’s easier that way.”

No! (Well, you can do whatever you like, actually.) Take the time to figure it out, it will pay off if you are wearing the corset more than once. The main function of the corset is to give you an hourglass waist. You will want to tighten the corset from the bottom up to the waist, and from the top down to the waist. When it’s all nice and tight and you cross the laces to make the knot and bow you can give it that last little pull and accentuate the waist even more.

Now, loosen those laces, put on your corset, and show it off!

~Happy Corseting, Amy Delicious
Posted in Corset Making, Costume Making, How To, News & Updates, Tips & Tricks... | Leave a comment

Applying Boning Tips

If you buy continuous rolls of spiral steel you’ll need to tip the boning that you’ve cut so that it slides smoothly into your casing and it doesn’t harm the fabric with sharp edges. These tips also work great on Hoop Boning, making the hoops slide into the long channels without catching on threads or seam allowances.

The best way to keep your tips from falling off is to crimp the tips before they are on the boning. (Wait, what? I’ve been trying to crimp them while on the boning for ages, and they always fall off… )

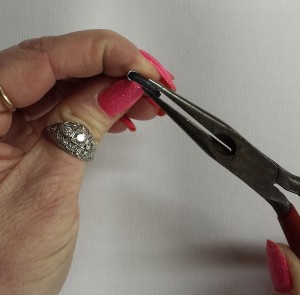
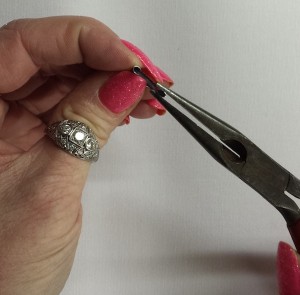
It’s easy to do with needle nose pliers. Start by crimping each of the sides partially closed. If you squeeze too much, use a flat head screwdriver to wedge it open a bit. (You probably have that screwdriver handy to change needles in your sewing machine.)

20150218_160607 20150218_160620

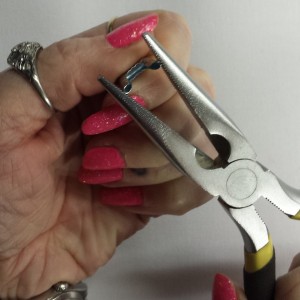
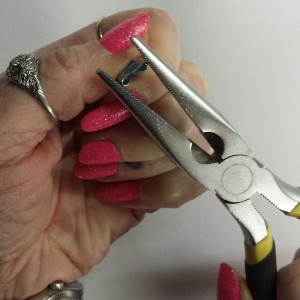
Next, squeeze the two sides together. I always squeeze them, and then test them for fit. If they are closed a “smidge” smaller than the width of the boning it may be more difficult to get onto the boning, but will stay on nice and tight. You can always use the pliers in the opposite manner and pry the sides out a bit. Put the closed pliers in the gap and pull open.

20150218_160633 20150218_160636

When you put the tip onto the end of the boning it should be tight. Work from one side to the other and cram it on. You can crimp it more after it’s on, but if it’s tight you won’t need to. Lay the piece of boning onto the outside of your corset over the channel it will go into before inserting. It’s easier to adjust the boning now, than try to pull it back out with the tip still on.

20150218_160651 20150218_160655

You can also use bone tipping fluid on your cut boning ends. You will need to dip the ends and balance them on something so they don’t stick to your work surface. Wait till they dry, and do it again to get a thorough coating.

20150219_103248
Another tip: If your using hoop boning, put a drop or two of fabric or craft glue on the boning before you put the tip on, let it dry and it will be even more solid.

~Happy Corseting, Amy

Posted in Corset Making, Costume Making, How To, News & Updates, Tips & Tricks... | Leave a comment

Boning Information & Comparison

Everything You Always Wanted to Know About Boning,
But Were Afraid to Ask…

There are many types of boning available and sometimes choosing the most appropriate type can be a confusing task. The comparison chart below is to help you decide what corset boning will be best for your particular project. Keep in mind that many times more than one type of boning will work for the same job… a lot of times the type of boning you select will be a personal preference of your own or of a clients.

Boning Comparison Chart

White Steel Boning

Spiral Steel Boning

White Steel Boning

Properties: A rigid bone made of nylon coated spring steel. 1/2" or 1/4" (6mm.) wide. Coating prevents rusting and is highly resistant to washing detergents, and other fluids.
Specs: High carbon, hardened, spring steel flat wire. Ends are white plastic dipped.
1/2" wide – .014" thick
1/4" (6mm.) – .010" thick
Advantages: A strong, rigid boning.
Disadvantages: Cannot be sewn in curved channels. Can buckle or twist within casing.
Degree of Flex: Moderate flex in one direction only.
Ideal for: Corset Boning. Costuming.
Cleaning: Dry Cleaning recommended
Tips: Not necessary.

Spiral Steel Boning

Properties: A sturdy, flexible bone made of galvanized spring steel wire. 1/2" or 1/4" (6mm.) wide. Available in pre-cut lengths or in continuous rolls.
Specs: Hardened, galvanized, spring steel round wire. Pre-cut lengths are tipped with nickel plated brass tips.
1/2" wide – .035" thick
1/4" (6mm.) – .028" thick
Advantages: A strong, flexible boning. Can be sewn in curved channels.
Disadvantages: The flex in two directions may not be appropriate for all applications.
Degree of Flex: High flex in two axis.
Ideal for: Corset boning, frequent or long-time wearings. It’s amazing stiffness when sewn into bone casing, coupled with its ability to flex in all axes, makes this boning ideal for areas that require mobility such as brassieres and curved corset seams.
Cleaning: Dry Cleaning recommended
Tips: Not necessary for pre-cut lengths. 1/2" or 1/4" metal tips for continuous spiral steel.

Plastic Boning

Hoop Boning

Plastic Boning

Properties: Extruded plastic boning. Designed for flexible support and to prevent rolling of garment materials.
Specs:
1/2" wide – .045" thick
1/4" (6mm.) – .080" thick
Advantages:
Plastic material is extremely durable and highly resistant to washing detergents and other fluids.
Disadvantages: Very flexible, not suitable for "waist-reducing" corset. Cannot be sewn in curved channels.
Degree of Flex: High flex in one direction only.
Ideal for: Costuming or garments that require very light support. Highly recommended for garments used in high voltage environments.
Cleaning: Machine or Hand washing.
Tips: Not necessary.

Hoop Boning

Properties: Two strips of steen encased by either white buckram or plastic.
Specs:
1/2" wide.
Advantages:
Will keep its circular shape when sewn into skirts.
Disadvantages: Will hold it’s curve after long wearings if used in corsets.
Degree of Flex: Moderate flex in one direction only.
Ideal for: Hoop Skirts. Costuming.
Cleaning: Dry Cleaning recommended
Tips: 1/2 metal tips recommended.

Rigilene Boning

Fusion Coated Boning

Rigilene Boning

Properties: Polyester boning . Can be sewn through.
Specs:
12mm or 8mm wide.
Advantages:
Soft edges for easy sewing by hand or machine. Flexible, durable, and will not crack.
Disadvantages: Very light support.
Degree of Flex: High flex, one direction only.
Ideal for: Specially created for giving shape and support to strapless garments, theatrical costumes, evening wear, beachwear, and soft toys.
Cleaning: Dry Clean or Hand Wash without loss of stiffness.
Tips: 1/2" or 1/4" Rigilene Tips. Black or White available.

Fusion Coated Boning

Properties: Fusion coated carbon steel. Very rigid
Specs:
1/2" wide – .050" thick.
Advantages:
A strong, rigid boning.
Disadvantages: Cannot be sewn in curved channels.
Degree of Flex: Very little flex, one direction only.
Ideal for: Busk Reinforcement. Heavy support. Costuming.
Cleaning: Dry Cleaning recommended
Tips: Not necessary.

Lacing Bones

Extra Wide Bones

Lacing Bones

Properties: Fusion coated carbon steel. Very rigid
Specs:
1/2" wide – .050" thick.
Advantages:
Very strong, rigid boning.
Disadvantages: Cannot be sewn in curved channels.
Degree of Flex: Very little flex, one direction only.
Ideal for: Back lacing bones for corsets.
Cleaning: Dry Cleaning recommended
Tips: Not necessary.

Wide Boning

Properties: A rigid bone made of nylon coated spring steel.
Specs:
1" wide –
Advantages:
A strong, rigid boning.
Disadvantages: Cannot be sewn in curved channels.
Degree of Flex: Very little flex, one direction only.
Ideal for: Busk reinforcement. . Heavy support. Costuming.
Cleaning: Dry Cleaning recommended
Tips: Not necessary.

BONING FAQ’s:

Q: So will I set off alarms at the airport wearing my corset that I made with your metal boning?

A: Metal detectors at airports are quite sensitive and will go off if you are wearing a metal boned corset. For time and convenience sake it would be recommended not to wear your metal boned corset when rushing to catch a flight. You may be detained and have your corset inspected, but at this time wearig a corset is still not considered a securtiy risk and you will not be arrested!

Q: Will metal boning rust?

A: Our metal boning is galvanized or coated to prevent rusting. However, if it is chipped or cut and not tipped with Tipping Fluid there is a chance it could begin to rust. For that reason you will see that most of our metal boning suggests Dry Cleaning as the recommended way to clean.

Q: Do I need tips for my boning?

A: Metal Bone Tips ARE necessary for tipping continuous spiral steel boining that you cut to length. We offer tips for both 1/2" wide and 1/4" wide widths. The Metal Bone Tips are also recommended for Hoop Boning in 1/2" width. Plastic Rigilene Bone tips are recommended for Rigilene Boning. We offer Rigilene Boning Tips in both black and white for both widths. These tips allow you to sew through them to anchor the tips in place.

Bone Tips are NOT recommended for White Bone or Plastic Bone.

Q: Can I sew through boning?

A: Rigilene Boning can be sewn through, however the other boning types cannot be sewn through.

Q: Do I need casing for my bones?

A: Yes, bone casing is recommended for all boning. Some people make their own casings, however we offer several different types of casings which is a much easier solution!

Posted in Corset Making, Costume Making, Product Reviews | Leave a comment

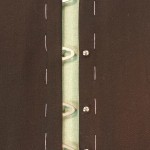
How to Set a Busk

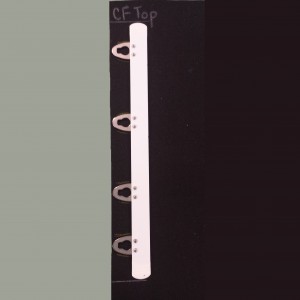
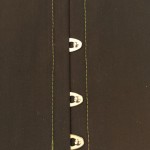
Corset busks are a standard closure for the center front of a modern corset.  They come in several varieties of shape, metal finishes, and qualities.  Busks are also available in many lengths to provide a suitable closure for everything from a short waist cincher to a long-line corset.

In this article we will be looking at an 11 inch “Standard Busk.”

When you measure the front of your corset for a busk remember to leave room at the top and bottom for finishing. I leave 5/8″ at top and bottom so I can sew 1/2″ bias tape and not break needles while sewing it on. I draft my Center Front to be 12.25″ to accommodate  an 11″ busk.

Set the “Eye Side” First
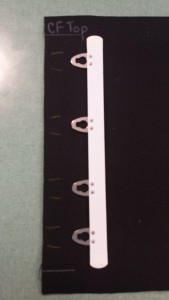
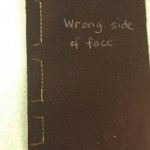
From the wrong side of your face fabric you will mark for the eye openings.
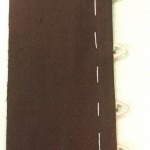
Place the eye side of the busk directly onto the fabric with the bar up, this will make sure the busk is facing the correct way in the garment. If you are using 1/2″ seam allowance you can lay the busk onto your fabric with the round edge of the eye at the cut edge of the fabric, it will place the bar of the busk 1/2″ from the edge.
Use a chalk pencil to mark the outside of the eyes.

Busk2Square RED_Busk3

Pin your face fabric to the lining right sides together. Sew your entire front edge, top to bottom, leaving openings where you marked the eyes.

RED_Busk4_edited-1-1

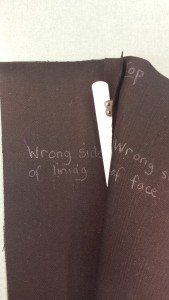
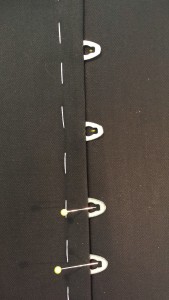
Press the seam open, then insert the busk’s eyes through the openings. Make sure the silver eye is closest to the face, and the white bar side of the busk is closest to the lining. Make sure your seam allowance is clearly out of the way of the openings.

RED_Busk5

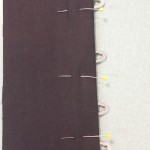
Pin and then baste in place.

RED_Busk6         RED_Busk7_edited-1

Set the “Post Side” Next
Pin your face fabric to the lining right sides together. Sew down entire front edge. Turn right sides out and press flat.
Place both sides together with the eyes on top of the fabric. Mark the center of the eye with a pin or chalk pencil.

RED_Busk9_edited-1

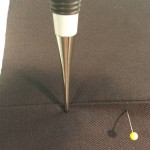
Using an awl, make a hole in the face fabric as large as needed to push the eye through. Go slowly so that you don’t tear the fibers. You can always put the awl back through the hole to make it larger if necessary. The awl will push the fibers out and when removed the fibers will gradually pull back together around the post.

 RED_Busk10 RED_Busk11

When all of the posts are through the face fabric: pin, then baste in place.
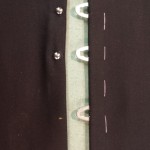
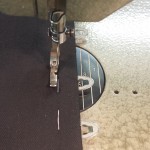
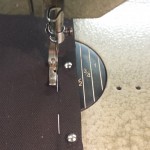
Sew along the edge of the busk using a zipper foot. Remove your basting stitches.

RED_Busk12  RED_Busk13  RED_Busk14  RED_Busk15_edited-1

Enjoy making your corset!

~Amy Delicious
Posted in Corset Making, How To, Tips & Tricks... | 4 Comments

Grommet/Rivet Removal

More than once, we have set a grommet or rivet and completely botched it. Or mid way through we decided that we should have used a different color. A few weeks ago we had a customer who had a rivet come out of her jacket and asked us if we could fix it. So, perfect time to share.
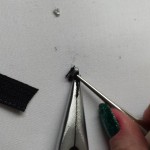
What you need:
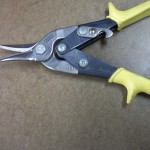
Tin snips/ wire cutters
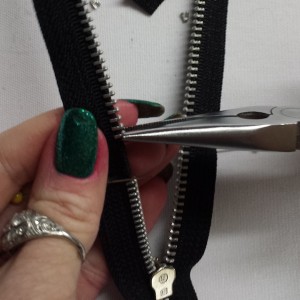
Needle nose pliers

Blog 1 Blog 1b Blog 1a Blog 2

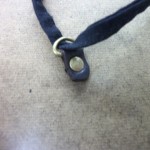
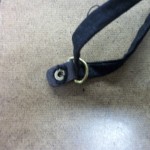
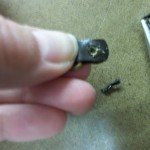
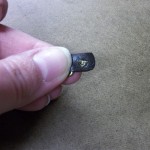
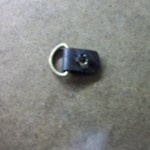
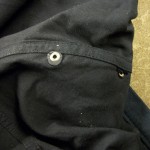
With this piece, the rivet had come out of the fabric but was still secure in the leather tab.

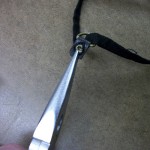
Gently take your tin snips and make some cuts in the washer. Then, take your pliers and carefully start rolling(I twist my pliers carefully around the grommet/rivet) the washer out. Take care to not cut into your fabric as the edges will be sharp. It may come off in several pieces, which is ok.

Blog 3 Blog 4 Blog 5

Once the back is off, you should be able pull the front (grommet/rivet) straight out of the fabric. Then you are all set to replace your grommet or rivet.

Side note: Due to the fact that the rivet came out of the fabric, when replacing it we have to reinforce the area on the inside. Using something that won’t fray is best. We had some extra leather scraps around so we just cut out a little circle for the reinforcer.

finished setting

Posted in Corset Making, Costume Making, Hat Making, How To, LeatherCrafting, Steampunk, Tips & Tricks... | Leave a comment