| 10am - 5pm Mon - Fri

0
BASKET   0
ACCOUNT

Your shopping cart is empty.

Bone Casing Rolls Restocked ...Click Here »

Boning Information & Comparison

Everything You Always Wanted to Know About Boning,
But Were Afraid to Ask…

There are many types of boning available and sometimes choosing the most appropriate type can be a confusing task. The comparison chart below is to help you decide what corset boning will be best for your particular project. Keep in mind that many times more than one type of boning will work for the same job… a lot of times the type of boning you select will be a personal preference of your own or of a clients.

Boning Comparison Chart

White Steel Boning

Spiral Steel Boning

White Steel Boning

Properties: A rigid bone made of nylon coated spring steel. 1/2" or 1/4" (6mm.) wide. Coating prevents rusting and is highly resistant to washing detergents, and other fluids.
Specs: High carbon, hardened, spring steel flat wire. Ends are white plastic dipped.
1/2" wide – .014" thick
1/4" (6mm.) – .010" thick
Advantages: A strong, rigid boning.
Disadvantages: Cannot be sewn in curved channels. Can buckle or twist within casing.
Degree of Flex: Moderate flex in one direction only.
Ideal for: Corset Boning. Costuming.
Cleaning: Dry Cleaning recommended
Tips: Not necessary.

Spiral Steel Boning

Properties: A sturdy, flexible bone made of galvanized spring steel wire. 1/2" or 1/4" (6mm.) wide. Available in pre-cut lengths or in continuous rolls.
Specs: Hardened, galvanized, spring steel round wire. Pre-cut lengths are tipped with nickel plated brass tips.
1/2" wide – .035" thick
1/4" (6mm.) – .028" thick
Advantages: A strong, flexible boning. Can be sewn in curved channels.
Disadvantages: The flex in two directions may not be appropriate for all applications.
Degree of Flex: High flex in two axis.
Ideal for: Corset boning, frequent or long-time wearings. It’s amazing stiffness when sewn into bone casing, coupled with its ability to flex in all axes, makes this boning ideal for areas that require mobility such as brassieres and curved corset seams.
Cleaning: Dry Cleaning recommended
Tips: Not necessary for pre-cut lengths. 1/2" or 1/4" metal tips for continuous spiral steel.

Plastic Boning

Hoop Bone Steel

Plastic Boning

Properties: Extruded plastic boning. Designed for flexible support and to prevent rolling of garment materials.
Specs:
1/2" wide – .045" thick
1/4" (6mm.) – .080" thick
Advantages:
Plastic material is extremely durable and highly resistant to washing detergents and other fluids.
Disadvantages: Very flexible, not suitable for "waist-reducing" corset. Cannot be sewn in curved channels.
Degree of Flex: High flex in one direction only.
Ideal for: Costuming or garments that require very light support. Highly recommended for garments used in high voltage environments.
Cleaning: Machine or Hand washing.
Tips: Not necessary.

Hoop Boning

Properties: Very rigid steel for Hoops, Panniers, and Tutus.
Specs:

7.5 mm – 0.65 mm thick
5.5 mm – 0.60 mm thick
Advantages:
Will keep its circular shape when sewn into skirts.
Disadvantages: Requires a specialized cutter. More suited for skirts than corsets.
Degree of Flex: Moderate flex in one direction only.
Ideal for: Hoop Skirts. Costuming.
Cleaning: Dry Cleaning recommended
Tips: Use Tipping Fluid to protect cut ends.

Rigilene Boning

Fusion Coated Boning

Rigilene Boning

Properties: Polyester boning . Can be sewn through.
Specs:
12mm or 8mm wide.
Advantages:
Soft edges for easy sewing by hand or machine. Flexible, durable, and will not crack.
Disadvantages: Very light support.
Degree of Flex: High flex, one direction only.
Ideal for: Specially created for giving shape and support to strapless garments, theatrical costumes, evening wear, beachwear, and soft toys.
Cleaning: Dry Clean or Hand Wash without loss of stiffness.
Tips: 1/2" or 1/4" Rigilene Tips. Black or White available.

Fusion Coated Boning

Properties: Fusion coated carbon steel. Very rigid
Specs:
1/2" wide – .050" thick.
Advantages:
A strong, rigid boning.
Disadvantages: Cannot be sewn in curved channels.
Degree of Flex: Very little flex, one direction only.
Ideal for: Busk Reinforcement. Heavy support. Costuming.
Cleaning: Dry Cleaning recommended
Tips: Not necessary.

Lacing Bones

Extra Wide Bones

Lacing Bones

Properties: Fusion coated carbon steel. Very rigid
Specs:
1/2" wide – .050" thick.
Advantages:
Very strong, rigid boning.
Disadvantages: Cannot be sewn in curved channels.
Degree of Flex: Very little flex, one direction only.
Ideal for: Back lacing bones for corsets.
Cleaning: Dry Cleaning recommended
Tips: Not necessary.

Wide Boning

Properties: A rigid bone made of nylon coated spring steel.
Specs:
1" wide –
Advantages:
A strong, rigid boning.
Disadvantages: Cannot be sewn in curved channels.
Degree of Flex: Very little flex, one direction only.
Ideal for: Busk reinforcement. . Heavy support. Costuming.
Cleaning: Dry Cleaning recommended
Tips: Not necessary.

BONING FAQ’s:

Q: So will I set off alarms at the airport wearing my corset that I made with your metal boning?

A: Metal detectors at airports are quite sensitive and will go off if you are wearing a metal boned corset. For time and convenience sake it would be recommended not to wear your metal boned corset when rushing to catch a flight. You may be detained and have your corset inspected, but at this time wearig a corset is still not considered a securtiy risk and you will not be arrested!

Q: Will metal boning rust?

A: Our metal boning is galvanized or coated to prevent rusting. However, if it is chipped or cut and not tipped with Tipping Fluid there is a chance it could begin to rust. For that reason you will see that most of our metal boning suggests Dry Cleaning as the recommended way to clean.

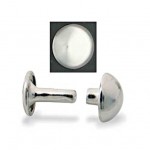
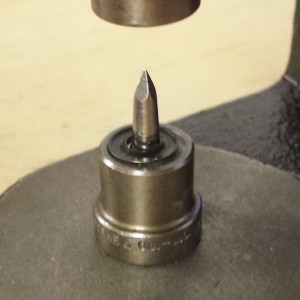
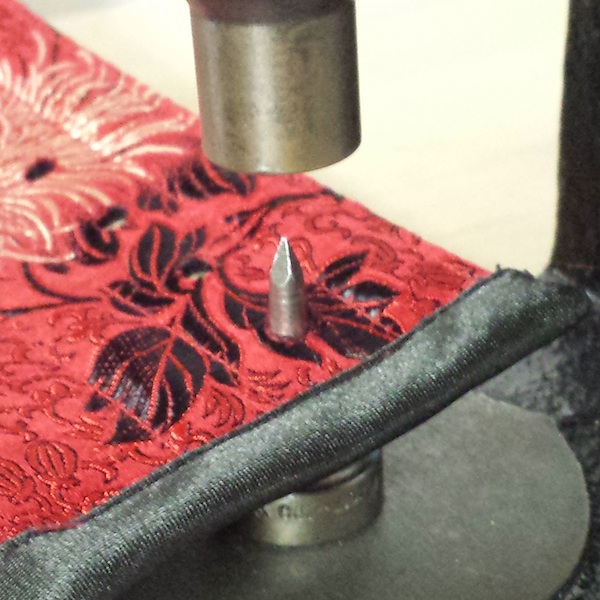
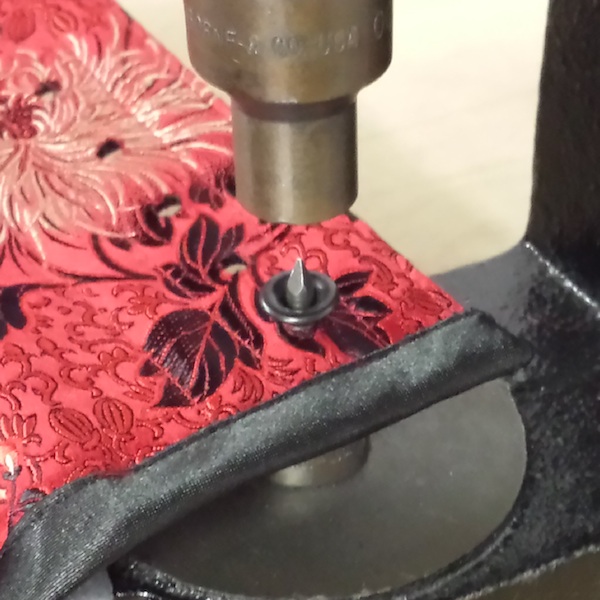
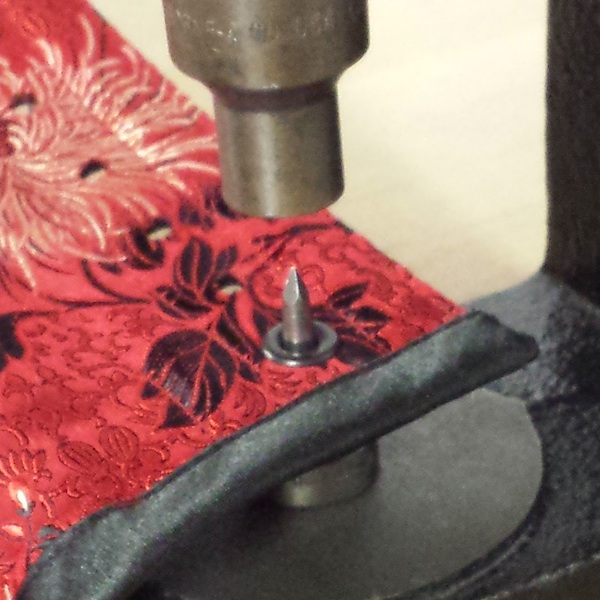
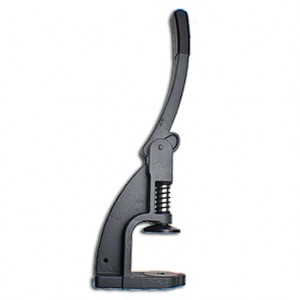
Q: Do I need tips for my boning?

A: Metal Bone Tips ARE necessary for tipping continuous spiral steel boining that you cut to length. We offer tips for both 1/2" wide and 1/4" wide widths. The Metal Bone Tips are also recommended for Hoop Boning in 1/2" width. Plastic Rigilene Bone tips are recommended for Rigilene Boning. We offer Rigilene Boning Tips in both black and white for both widths. These tips allow you to sew through them to anchor the tips in place.

Bone Tips are NOT recommended for White Bone or Plastic Bone.

Q: Can I sew through boning?

A: Rigilene Boning can be sewn through, however the other boning types cannot be sewn through.

Q: Do I need casing for my bones?

A: Yes, bone casing is recommended for all boning. Some people make their own casings, however we offer several different types of casings which is a much easier solution!

Posted in Corset Making, Costume Making | Leave a comment

Ooops! Forgot Something?

Ooops!

It happens to the best of us… In your rush to purchase the supplies needed to complete your project you forgot to include a couple important items in your order.  Now there is a quick and easy way to add items or modify an order! (As long as the order has not already been pulled and shipped.)

Modifying An Order

The “Modify An Order” link is “https://corsetmaking.com/modify-order.html”.  From here you can do the following:

Add Some Forgotten Items:

Here’s the easiest way to add some items to your original order:

  • You will need to fill out the Order Modification Request Form on the Modify An Order  page.

  • Even if you plan on calling, please submit the form first so that we have it on hand to accompany your call.

  • If you are only adding items to your order, write “None” in the “Items to Cancel” field.

  • In the “Items to Add” field, list the Quantity, Items, and any necessary Item Variations (length, width, color, etc.) for all items your would like added to your order.

  • Check the 3 Agreement boxes at the bottom of the form and Submit.

Modify or Delete Some Items:

The easiest way to modify any items in your original order is to list all incorrect items in the “Items to Cancel” field, and then list the corrected items in the “Items to Add” field.

For example: If you accidentally ordered 5 rolls of 1/2″ White Bone Casing but you wanted 5 Rolls of 1/2″Black Bone Casing, then CANCEL the original 5 rolls of White and then ADD the corrected 5 rolls of Black in the appropriate fields of the form.

  • You will need to fill out the Order Modification Request Form on the Modify An Order  page.

  • Even if you plan on calling, please submit the form first so that we have it on hand to accompany your call.

  • List all incorrect or unwanted items in the “Items to Cancel” field of the form.

  • In the “Items to Add” field, list the Quantity, Items, and any necessary Item Variations (length, width, color, etc.) for all of the corrected or new items your would like added to your order.

  • Check the 3 Agreement boxes at the bottom of the form and Submit.

Terms:

  • Order Modifications are only possible if we receive your request before the original order has been packaged & shipped.

  • All order modifications are subject to a service charge of $1.49 to cover the additional processing fees.

  • Order modifications may increase the shipping cost and delay the delivery date of your order.

  • By requesting an Order Modification you are authorizing Delicious LLC to charge additional product costs and fees using your original payment method.

  • If additional charges are to be paid by PayPal, payment must be received before the order will be modified and shipped.

Act Fast!

Our staff is fast and efficient, so you’ll want to act fast if you realize you’ve forgotten something!  Most orders are pulled within 1 or 2 business days, many get pulled same day.

Posted in Bra Making, Corset Making, Costume Making, Hat Making, LeatherCrafting, News & Updates, Steampunk, Website Features | Leave a comment

What’s New?… “New” is New!

Hello Makers!

Here’s some exciting news about New Arrivals…

In the past New Arrivals would often end up buried in sub-categories of our site because there was no easy way to categorize them outside of their department.  Now, however, technology’s warm loving glow has bestowed upon us a much better way to share all of our new arrivals regardless of the category under which they might fall!

All you MakingItYourself regulars may have noticed the “New” category that now lives in the first, far left, position in the Top Navigation Bar… this is now where you can go to find all our latest offerings – finally a way to see all New Arrivals in one place!

And for all you mobile web surfers, if you are shopping on a mobile device, the “New” category will fall at the top of the Departments list in the left navigation menu.

Check it out…. see what’s new!

See what's new sitewide in our new "New" category!

See what’s new sitewide in our new “New” category!

Posted in Bra Making, Corset Making, Costume Making, Hat Making, LeatherCrafting, New Arrivals, News & Updates, Steampunk, Website Features | Leave a comment

New Customer Submissions!

This stunning red corset with gold bias trim is made more show stopping with the beautiful flower appliques. Great job Melissa!

Melissa Davis

We don’t just sell supplies to make corsets and bras, we sell supplies to celebrate corsets and bras! You’re making our mouths water Michelle!

Michelle Fitzgerald

Keep the photos coming folks, we love to see what you’ve done with our supplies!

Using our bra making supplies from BraMaking.com Sharon made these cute matching sets. The lace set is classic yet playful, and the animal print set features a nursing bra. Nursing bras are usually so bland. It is a welcomed change to see fun nursing lingerie.
You can find her fun lingerie on etsy.com under OwlAboutCloth.

  S.Rouse-faux lace bra
S.Rouse-set

S.Rouse-nursing set

~Amy Delicious


Posted in Bra Making, Corset Making, Costume Making, Customer Creations! | Leave a comment

Delicious Fashion Shows and More!

This is a snippet of work from Delicious Corsets over the years. 

Applique work and special projects for customers…
daisy_f    DC-CUS-SH1  DC-Flame  DC-CUS-ROSE-Zladybug  jen_flame_f  DC-L22D05X25-A  KatFlameCrown  BootCorset  OLYMPUS DIGITAL CAMERA  DC-CH-CUS-Abby  DC-CH24LEA  RonIannotti  t 2 redone


Artist Carrie Ann Baade
CarrieAnnBaade1-600  CarrieAnnBaade2-600

The Pontani Sisters and other performers…
Pontani_side_2  OLYMPUS DIGITAL CAMERA  OLYMPUS DIGITAL CAMERA  OLYMPUS DIGITAL CAMERA

ShiraGirl
Back  Band  Jumping  OnStageOnStage2  Sidehem  WithBCbanner  WithBCbanner2

Fashion Shows
Star  MensWear  MarianRachelMeg  CherylAdriannaHoop  HoopBallons  MothraFront  Ceci2  Ceci  DC-CH-Candy  David  White_InkCorset  Pinstripe2  PinstripeCorset_Skirt  Black_GreyMM  MMBustle2  MMBustleBack  BlueDenimMadMax  BlueDenimMM2

Diabolique Ball Philadelphia 2014.
Diabloique2015-8  Diabloique2015-7  Diabloique2015-6  Diabloique2015-5
Diabloique2015-3  Diabloique2015-4  Diabloique2015-2  Diabloique2015-1

Prom Corsets
Prom  DC-GD-Floor

~Thanks For Checking these out, Amy Delicious
(Still on the hunt for more photos on this computer…)


Posted in Corset Making, Costume Making, In-House Creations! | Leave a comment

Bridal Creations from Delicious

Delicious Corsets bridal designs using supplies from CorsetMaking.com

These are some photos from over the years of some lovely brides who chose Delicious and allowed us to take part in their big day! Thank you, we love helping to make your wedding gown just as you imagine it!

Red silk corset with matching bustled silk skirt and a white tulle petticoat. Thanks Eva!
Nicole 3
 Nicole 11 Nicole 27


Lisa, this combination of silk, lace overlay, lace drape and armlettes, and georgette skirt is stunning, having fun with the photos too!
Websized


This whole wedding party was grey and white. We made the grey pinstripe corset, the matching shorts with white silk welt pockets, and their twin boys also got the grey and white pinstriped shorts. Liz and Shannon, we’re honored to be part of your big day!

Screen shot 2015-07-16 at 2.44.29 PM  Screen shot 2015-07-16 at 2.45.49 PM Screen shot 2015-07-16 at 2.49.14 PM Screen shot 2015-07-16 at 2.51.27 PM

Screen shot 2015-07-16 at 2.52.10 PM


Some non traditional wedding attire. 
DSC_5064
 Lindsay DC-BR-B-CUS-TN


Beautiful Lauren in a silk corset with ruched tulle at the bust and a super full princess skirt. The bust line and hem were adorned with Swarovski Crystals.
DC-BR-LK-A  DC-BR-LK-D  DC-BR-LK-C DC-BR-LK-E


Another non-traditional bride. I just loved making this bias cut blue and brown plaid skirt! And the bride was stunning! Mamie, thanks for putting a new twist on bridal!
DC-BR-BMD-A
   DC-BR-BMD-B   DC-BR-BMD-C


The lovely Betsey in our Corseted wedding gown. Complete corset underneath with the gown attached at the top leaving an open V in the back to expose the corset and lacing. A healthy dose of pink tulle at the hem compliments the pink corset! As you can see, great for dancing.
DC-BR-BS-1
  DC-BR-BS-2  DC-BR-BS-3


Becky was nearly drowning in this tulle underskirt. Her red brocade asymmetrical over skirt and corset are totally unique. I love the combination of colors and textures. What a beautiful day! (I wish I had a photo of me drowning in the tulle at my Juki.)
  Becky2  Becky5

Becky

Becky1  Becky3 Becky4  Becky6


Shannah’s Alice in Wonderland wedding was spectacular! Her black and white corset had exposed bone casings and lace trim. Her tulle underskirt is layers of black, white, and more black in graduating widths. The brocade bustled overskirt took over 16 yards of brocade, and the longest pattern pieces I’ve ever drafted!
  Shannah4Shannah6

Shannah1 Shannah2 Shannah5


We also make corsets as foundations for gowns bought at bridal boutiques.
Scan 1
Scan 2


This corset gown was made from the same material you use at the bottom of Footy Pajamas, little rubber bumps and all! It looked like a point d’esprit. Daffodil tulle and lacing to go with the fresh Daffodils. Thanks Erin!
DC-BR-CGC-C
 delicious_(23_of_45) delicious_(33_of_45)


Wow, Jenni, Kat, Rebecca, all beautiful!
DC-BR-JF DC-BR-Crown Rebecca


Although red is not your traditional wedding gown color, we seem to make quiet a few red corsets and gowns. As you can see with Mae, it is stunning and dramatic!
DC-BR-MCH-A
DC-BR-MCH MaeDip Capes&Clokes


I love when a bride wants to incorporate bright colors, the orange bias trim and lacing were made from a piece of fabric the bride had found and loved. There are pale lavender silk flowers nestled into the bustled silk skirt. And you have to love a bride with a sense of humor! (And her sister as well!) Fabulous smile Michelle!
DC-BR-MS-A
 DC-BR-MS DC-BR-MS-B DC-BR-MS-C


This was a collaboration with an artistic bride, Shelita. We gave her the silks and she pieced all the different colors together making her own unique fabric. We then used her hand made fabric to cut out her corset. Totally one of a kind, and she was glowing!
DC-BR-SCH-A-TN
 DC-BR-SCH-B CCE00000


This is while in progress, as you can see by my pins. I’m still looking for a photo of the entire ensemble, I can assure you, it was stunning! 
RhinestoneAppliques


Sara was another bride in red, these were from such a long time ago that some of these pics had to be scanned from Polaroids.
Sara1 Sara2

Sara Sara3 Sara4


Please excuse the mannequin, the bride was unavailable for photos!
DC-BCH24D01-A
 DC-BCH24D01-B DC-BCH24D01-C DC-BCH24D01

DC-BR-CGF-TN DC-BR-LOD-A DC-BR-LOD-B DC-BR-LCH DC-BR-ECH

~Amy Delicious

Posted in Corset Making, In-House Creations! | Leave a comment

Setting a D-Ring With Clip

You can attach this D-Ring with the attached Nickel Clip onto any existing corset, bag, purse, backpack, pair of Jeans, or belt. Anything, really. With a Rivet or a Chicago Screw.

20150707_160206_resized   20150707_160235_resized

I used this D-Ring with the attached Nickel Clip on a purse recently. I always like having a D-Ring on the exterior of my bags so I can easily attach my keys. I know exactly where they are and they are really easy to grab when getting into my car or house in the evenings. No fumbling around in the interior of my purse. I attached it with a 7mm domed rivet.
LCS-DR-C0375NK       LCS-STR-DR07NK  LCS-T-DR07    Rubber Mallet
To set the rivet you do need the Rivet Setter, but once you have the setter and rivets, you’ll use them again and again. Attaching this took only a couple seconds. Much easier than sewing through a leather purse with leather lining to sew a D-Ring to the purse.

You just make a small hole with a Revolving Leather Punch or an Awl, the center post of the rivet is very narrow, so you don’t need much of a hole to press it through. Insert the post from the wrong side and place the cap on top snugly. You’ll feel it pop on. Set the post on a sturdy table, place the Rivet Setter onto the dome and hit the Setter with a Rubber Mallet a couple times. Easy Peasy! You may want to do a test on a similar weight of fabric first, if the fabric or leather is too lightweight, just cut a small circle of heavier weight leather for a reinforcer and put the rivet through both.

Rivet-on-bag
Plus, you can set the rivets anywhere! I added three to the same purse’s strap for a bit of extra decoration.

You can also insert a Chicago Screw into the D-Ring with the attached Nickel Clip if you need to go through a hard surface or very thick leather. Plus, the Chicago Screws can be removed. This is the 1/4″ Nickel Chicago Screw fitting easily through the hole in the Clasp.

Chicago ScrewScrew2


~Happy Adorning, Amy Delicious

Posted in Costume Making, How To, LeatherCrafting, Product Reviews, Steampunk, Tips & Tricks... | Leave a comment

Setting Grommets: Grommet Setting Machine

If you have many Grommets to set, the best way to set 2 part Grommets & Washers is to use the Grommet Setting Machine.

~Test setting a grommet on scrap fabric first. Make sure it is similar in weight to the garment you will be setting the grommets into. Test the cutting die and setting grommets, so you are familiar with doing it before putting a hole into your garment.

Mark the locations: Mark the location of the grommets onto the face or the lining with a chalk pencil. If you make a mistake the chalk pencil is easily removed. Remember to leave an equal amount of space at top and bottom, and to space your grommets evenly.
For the size 00, I like to space the grommets 3/4″ apart. For the size 0, I would space the grommets 1″ apart. Make sure both sides of the garment mirror each other.

Marking holes

Cut holes: Die sets with cutting die: The Grommet Setting Hand Machine comes with a dense white plastic disk or puck. This disk is used for the cutting die. Place the disk on the base of the machine, screw the cutting die onto the top spring arm and pull the handle down to cut the holes for the grommets. Cut all of your holes, then change the dies to set the grommets. The cutting die cuts all the way through your layers easily, you can cut all of your holes in no time at all.

IMG_0027  IMG_0026
If the die set you purchase doesn’t come with a cutting die you’ll need to cut the holes with either a hole punch size 00 or in size 0, fabric punch, or a revolving punch to make the hole for the grommet.

HolePunchMaxiPunch  Leather Punch

Attach the Dies: The bottom die has a spike of sorts that stands up. It gets placed into the hole on the base and tightened with a hex key/allen wrench. The top die gets screwed onto the top of the setter attached to the spring arm. The photo below shows the dies in the Grommet Setting Machine. There is a washer on the bottom die.

DiesGrommets

Set the Grommets: Place the washer over the spike, the die on the base has a convex indentation that the washer will fit into. Next place the garment over the spike right side up, then the grommet. Pull down on the handle and the top die will crimp the grommet in place in a second.

WasherOn2  GarmentOn2

GrommetOn2  GrommetPress

SetGrommet2  Grommetted

You may need to adjust the height of the top die up or down to make sure that the grommet is crimped enough for the thickness of the fabric or leather you are using. Test a scrap piece of fabric that is a similar weight to what you are setting the grommets into.

Setting Size 0 or Size 00 the pieces will all look the same as pictured above. For the Size 5 and Size 12 the dies and cutter look far larger! The process is still the same, though.

~Happy Grommeting, Amy Delicious

Posted in Corset Making, Costume Making, How To, LeatherCrafting, Product Reviews, Tips & Tricks..., Tools & How to Use Them | Leave a comment

Grommet Setting Hand Machine

The Grommet Setting Hand Machine may be a costly investment, but it is a professional tool that will help save time. It is also a very versatile machine.

HandMachine
The disk that is shown in the photo is only used for covering buttons, remove it to use other dies. It also comes with a hardened white plastic disk for use with the grommet setting dies that come with a cutting or punch die. You will need a hex key or allen wrench to attach the various dies available. 

You can use the Grommet Setting Hand Machine for setting many sizes of grommets. You can buy the snap setting dies in different sizes, rivet setting dies, and the dies for covering buttons.

You will need to mount it to a table, we use a small butcher block table with shelves underneath to keep dies and supplies. It comes with an allen wrench to change the dies and other than that it’s just pull and set.

Setting Grommets: There are many different size grommet dies available. We stock sizes 00, 0, 5, and 12. Size 00 are the smallest, and Size 12 are very large. For corset making Size 00 or 0 work best. Once you have the dies, the grommets come in a variety of different finishes. Click this link for directions.

Setting Snaps: There are different dies available, Sizes 20 and 24 among others. Once you have the dies, the snaps come in a variety of different finishes. Click this link for directions.

Setting Rivets: Fits Jiffy Rivets, double and single caps, baby, small, and medium sizes. Also works with tubular rivets.

Covering Buttons: There are different sizes of Button Covering Dies, we sell the Size 22. If you are covering many buttons, this setter will save time and give you a professional looking button time and time again.

~Happy Corseting, Amy Delicious

Posted in Corset Making, Costume Making, LeatherCrafting, Product Reviews, Tools & How to Use Them | Leave a comment

Cutting Continuous White Steel Boning

When you buy a continuous roll of boning you have the freedom to cut your pieces of boning to exactly the right length, as opposed to just rounding to the nearest half inch. You can work on your project according to your own time frame, you don’t have to know ahead of time exactly what sizes you will be using. If you make alterations in your patterns, you can cut the boning to the right size as you need it. You can also use smaller or longer pieces than are available pre-cut and tipped.

WhiteBoneCutters


Cutting white steel boning: The best cutter for white steel are these snips. We are happy to finally offer them for sale. They have a longer blade than the cutters for the spiral steel, and they have 4 pivot points, increasing the torque, and the ease of cutting steel boning. They also have a safety latch to keep the tidy and closed while you have them tucked away in your tool bin.

Mark your length with a marker and cut straight across, then snip the two corners off. Use a metal file to smooth the sharper cut ends. *If you don’t file the edges you will increase your risk of the sharpened steel weakening your casings and fabrics.

MarkWhite  CutWhiteCornerWhite  FileWhite
You can apply nail polish to the cut ends if the garment won’t be washed or dry cleaned.
To avoid rusting and  for a permanent coating use Bone tipping fluid. Dip the ends, allow to dry, then add a second coat. (I set the boning onto a small mason jar so they don’t stick to the table while drying.)

DippingWhite  Tippimg White3

~Happy Corseting, Amy Delicious

If you don’t have enough hand strength to squeeze the snips, simply put the back edge of the bottom handle firmly on your table, then press the top handle down to make the cut. Hold the boning firmly in your other hand so that it stays stable and cuts cleanly.

SnipsOnTable2


Posted in Corset Making, Costume Making, How To, LeatherCrafting, Tips & Tricks... | Leave a comment